
이미지 검출
가장자리 검출
미분을 통해 밝기 변화율이 큰 부분을 가장자리로 판단
변화율이기 때문에 노이즈에 민감하여 블러링 필요
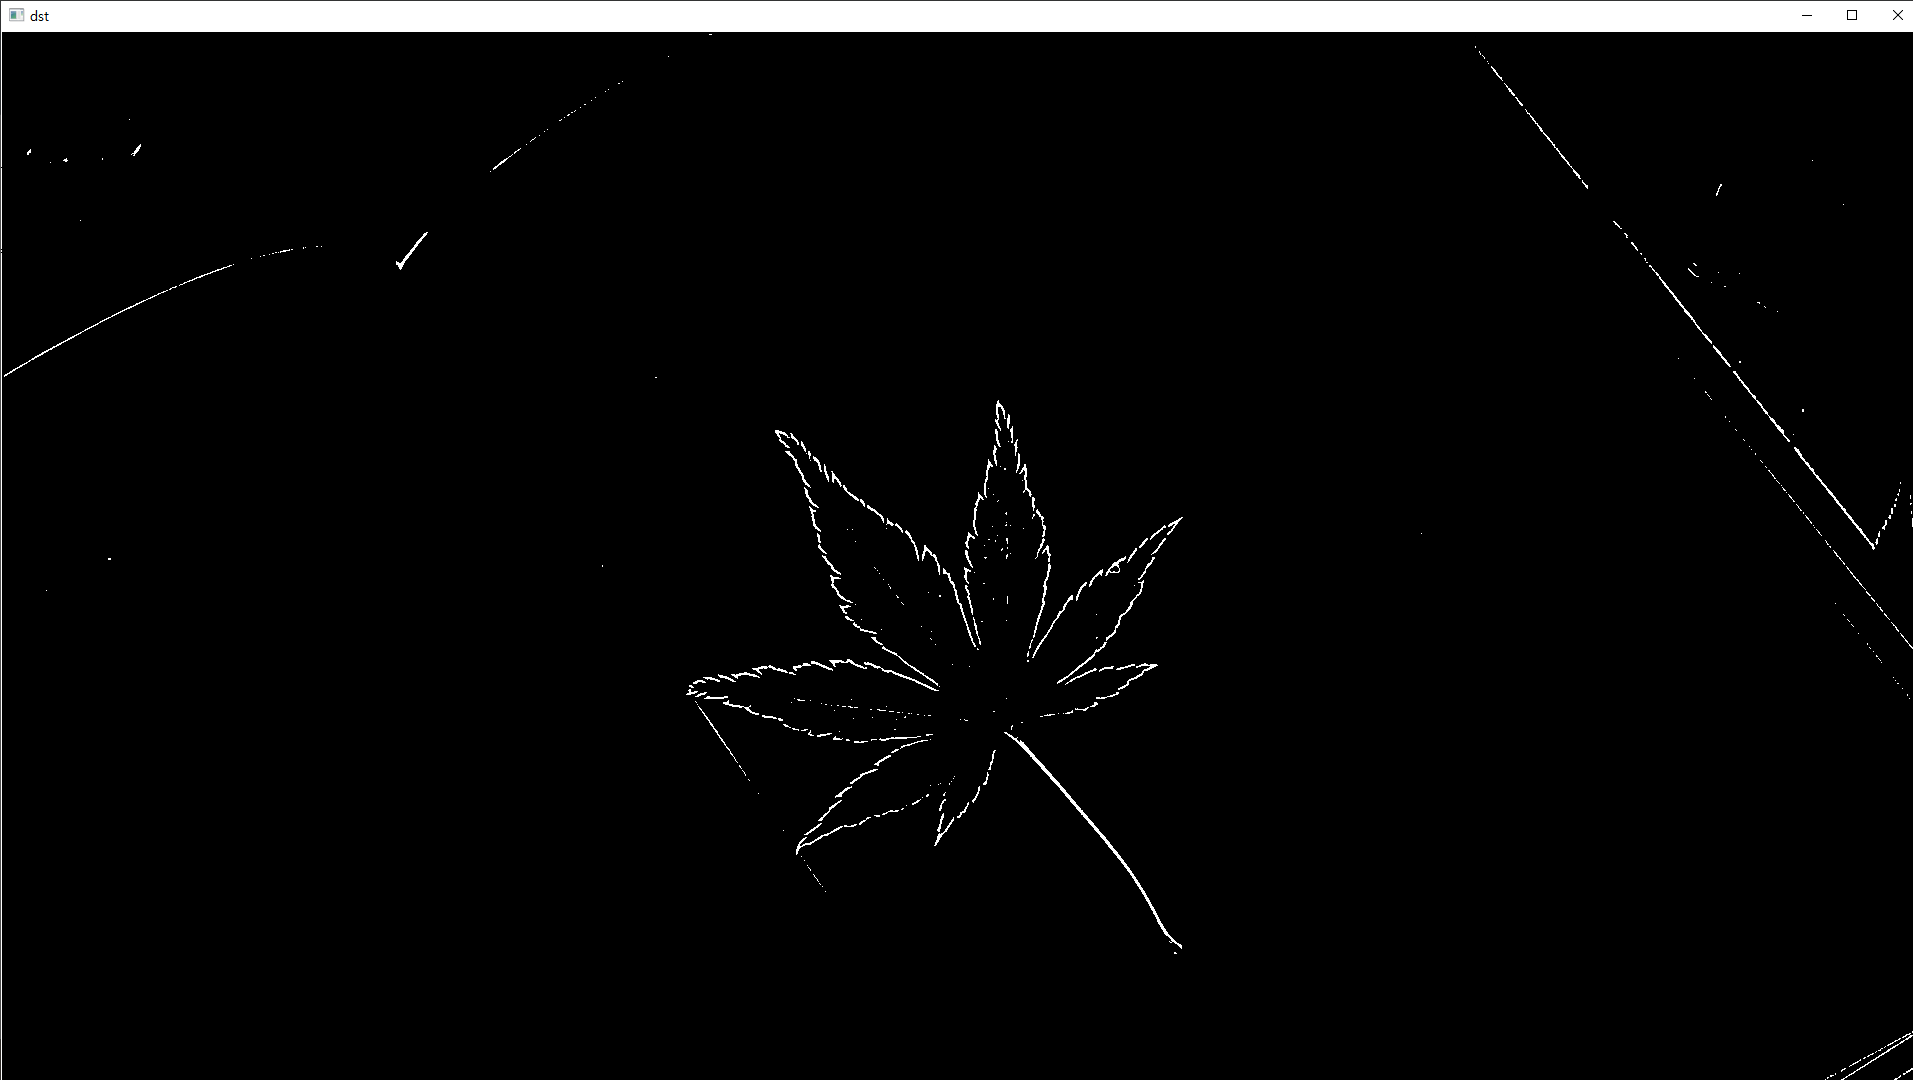
소벨 필터(미분) - 모든 방향(가로, 세로, 대각선)의 가장자리 검출 가능, 대각선에 (비교적) 민감하게 반응, 커널이 작으면 정확도 떨어짐
샤르 필터 - 소벨 미분의 단점을 보완, 커널을 3x3만 씀, 소벨보다 빠르고 정확
라플라시안 - 2차 미분 형태 : 낮은 값으로 둘러싸인 픽셀은 음수를 최대화, 높은 값으로 둘러싸인 픽셀은 양수를 최대화
캐니 엣지 - 대부분 이거 씀 : 노이즈에 민감하지 않다(알아서 블러 처리하기 때문), 히스테리시스 임곗값 적용 참고
# 소벨 필터
import cv2
import numpy as np
src = cv2.imread('book.jpg', cv2.IMREAD_GRAYSCALE)
src = cv2.GaussianBlur(src, (5, 5), 0, 0, borderType=cv2.BORDER_ISOLATED) # 가우시안블러
dx = cv2.Sobel(src, cv2.CV_32F, 1, 0, delta=0)
dy = cv2.Sobel(src, cv2.CV_32F, 0, 1, delta=0)
mag = cv2.magnitude(dx, dy) # 그레디언트 크기
mag = np.clip(mag, 0, 255).astype(np.uint8)
dst = np.zeros(src.shape[:2], np.uint8)
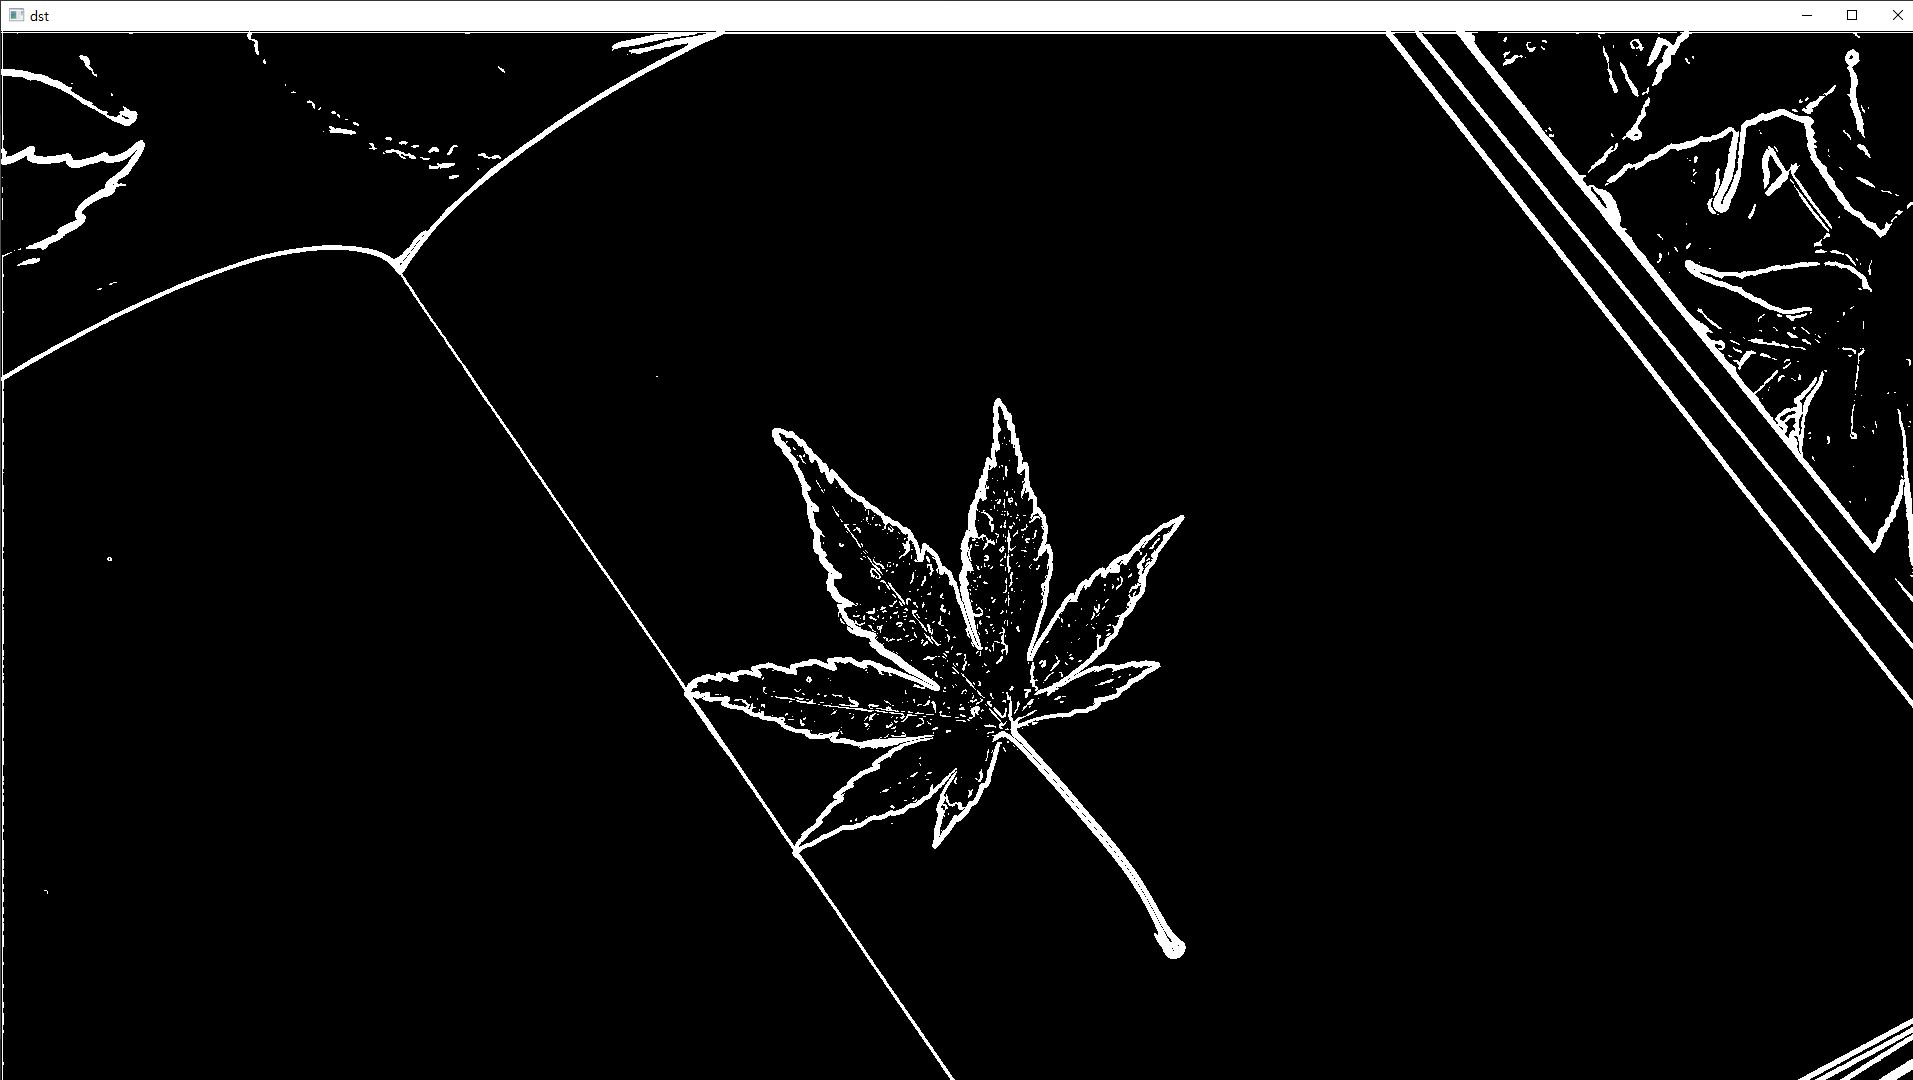
dst[mag > 192] = 255 # 192보다 크면 255로 고정(트랙바 이용해 적절한 값 찾을 수 있다
cv2.imshow("mag", mag)
cv2.imshow("dst", dst)
cv2.waitKey(0)
cv2.destroyAllWindows()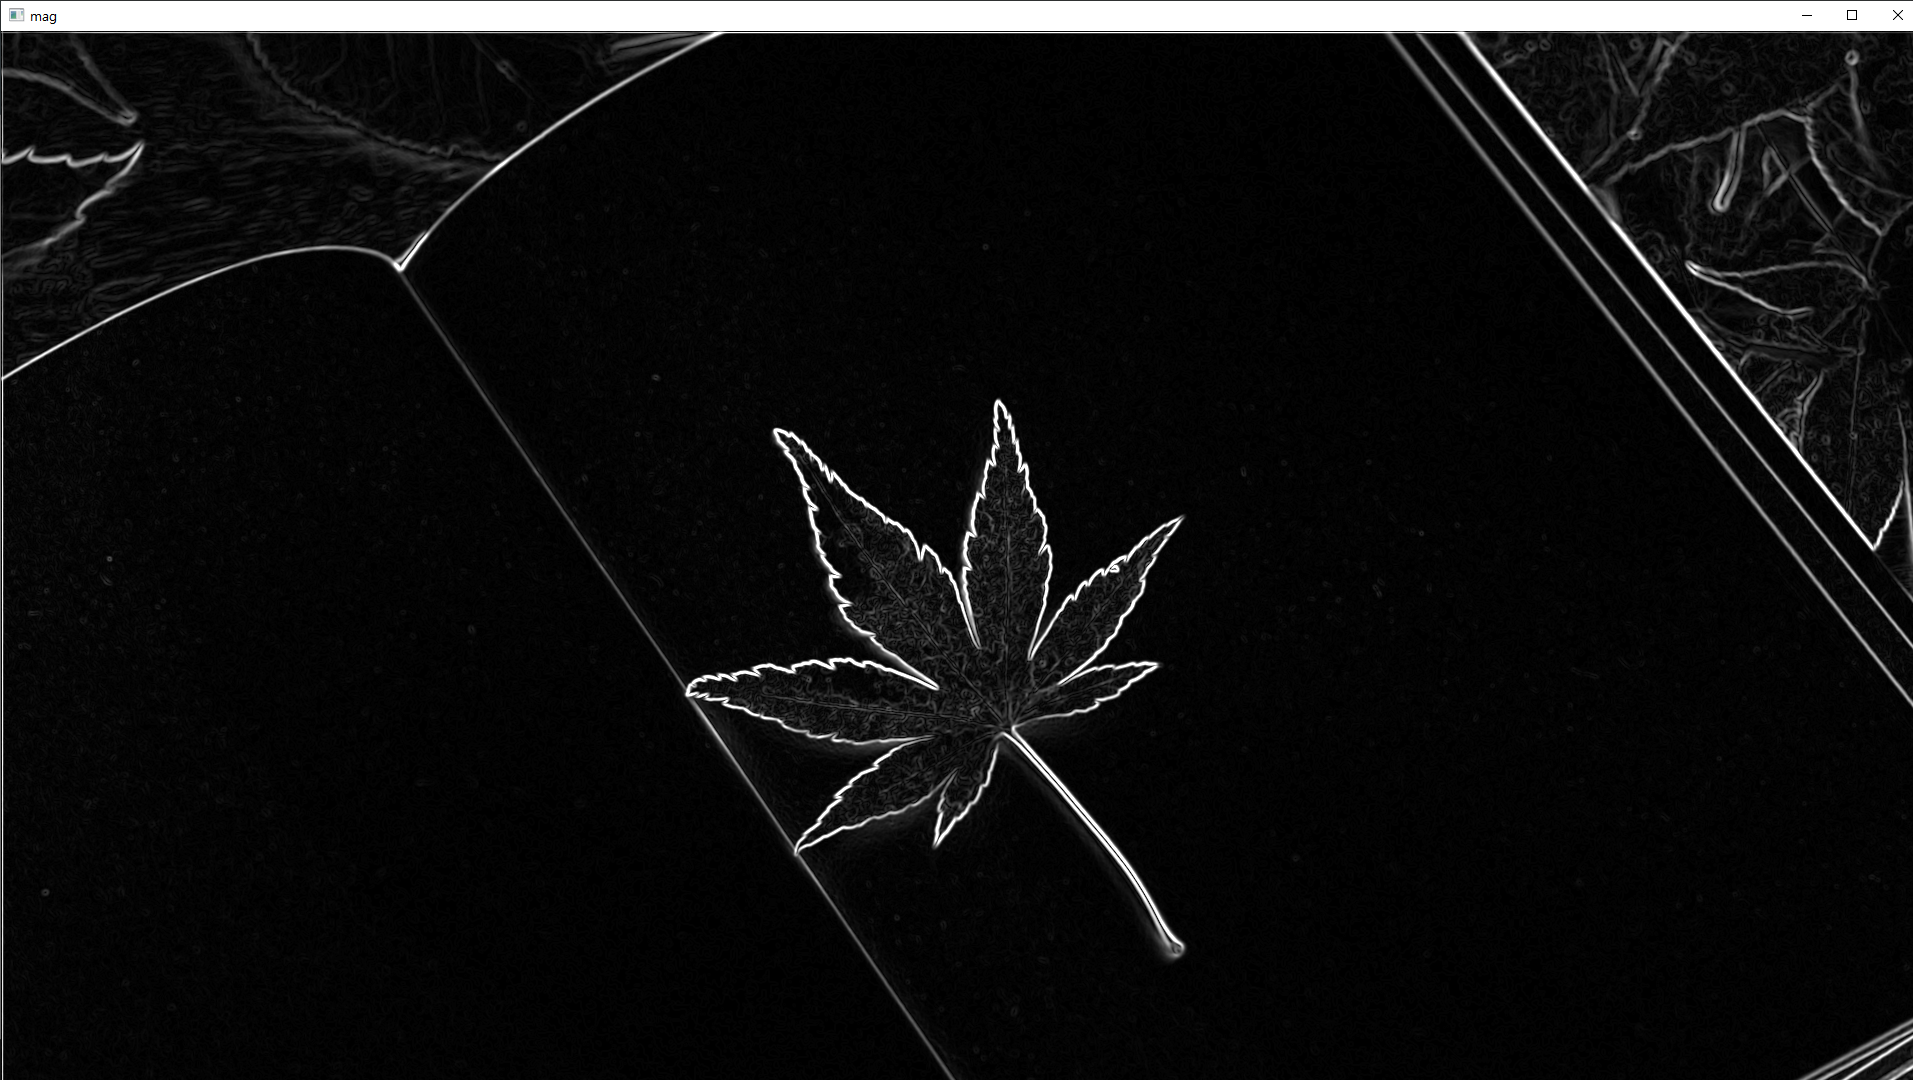

# 샤르 필터 : 소벨보다 속도가 빠르다

import cv2
import numpy as np

src = cv2.imread('book.jpg', cv2.IMREAD_GRAYSCALE)

src = cv2.GaussianBlur(src, (5, 5), 0, 0, borderType=cv2.BORDER_ISOLATED)
dx = cv2.Scharr(src, cv2.CV_32F, 1, 0, delta=0)
dy = cv2.Scharr(src, cv2.CV_32F, 0, 1, delta=0)

mag = cv2.magnitude(dx, dy) # 그레디언트 크기
mag = np.clip(mag, 0, 255).astype(np.uint8)
dst = np.zeros(src.shape[:2], np.uint8)
dst[mag > 192] = 255

cv2.imshow("mag", mag)
cv2.imshow("dst", dst)
cv2.waitKey(0)
cv2.destroyAllWindows()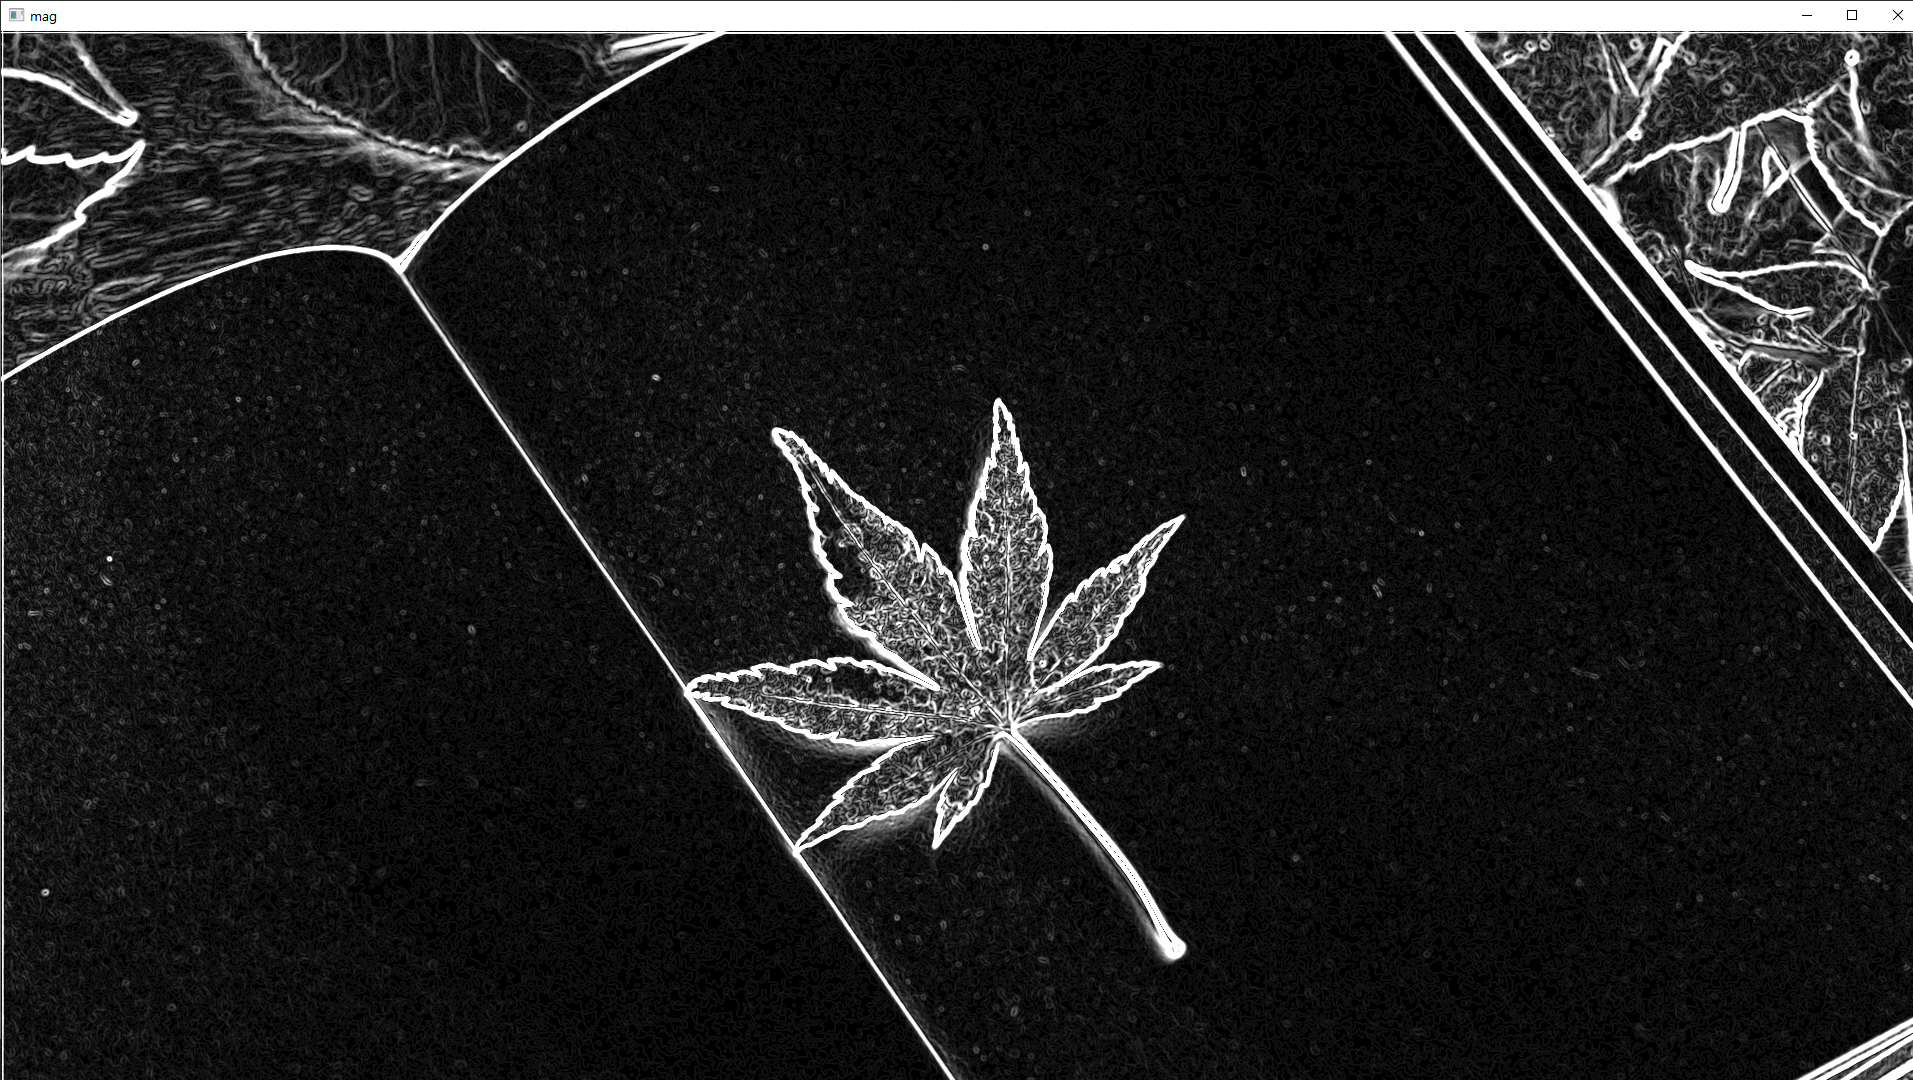
# 라플라시아

import cv2

src = cv2.imread('book.jpg', cv2.IMREAD_GRAYSCALE)
# src = cv2.imread('car.png', cv2.IMREAD_GRAYSCALE)

src = cv2.GaussianBlur(src, (5, 5), 0, 0, borderType=cv2.BORDER_ISOLATED)
laplacian = cv2.Laplacian(src, cv2.CV_8U, ksize=3)
dst = np.zeros(src.shape[:2], np.uint8)
dst[laplacian > 40] = 255

# cv2.imshow("src", src)
cv2.imshow("laplacian", laplacian)
cv2.imshow("dst", dst)

cv2.waitKey(0)
cv2.destroyAllWindows()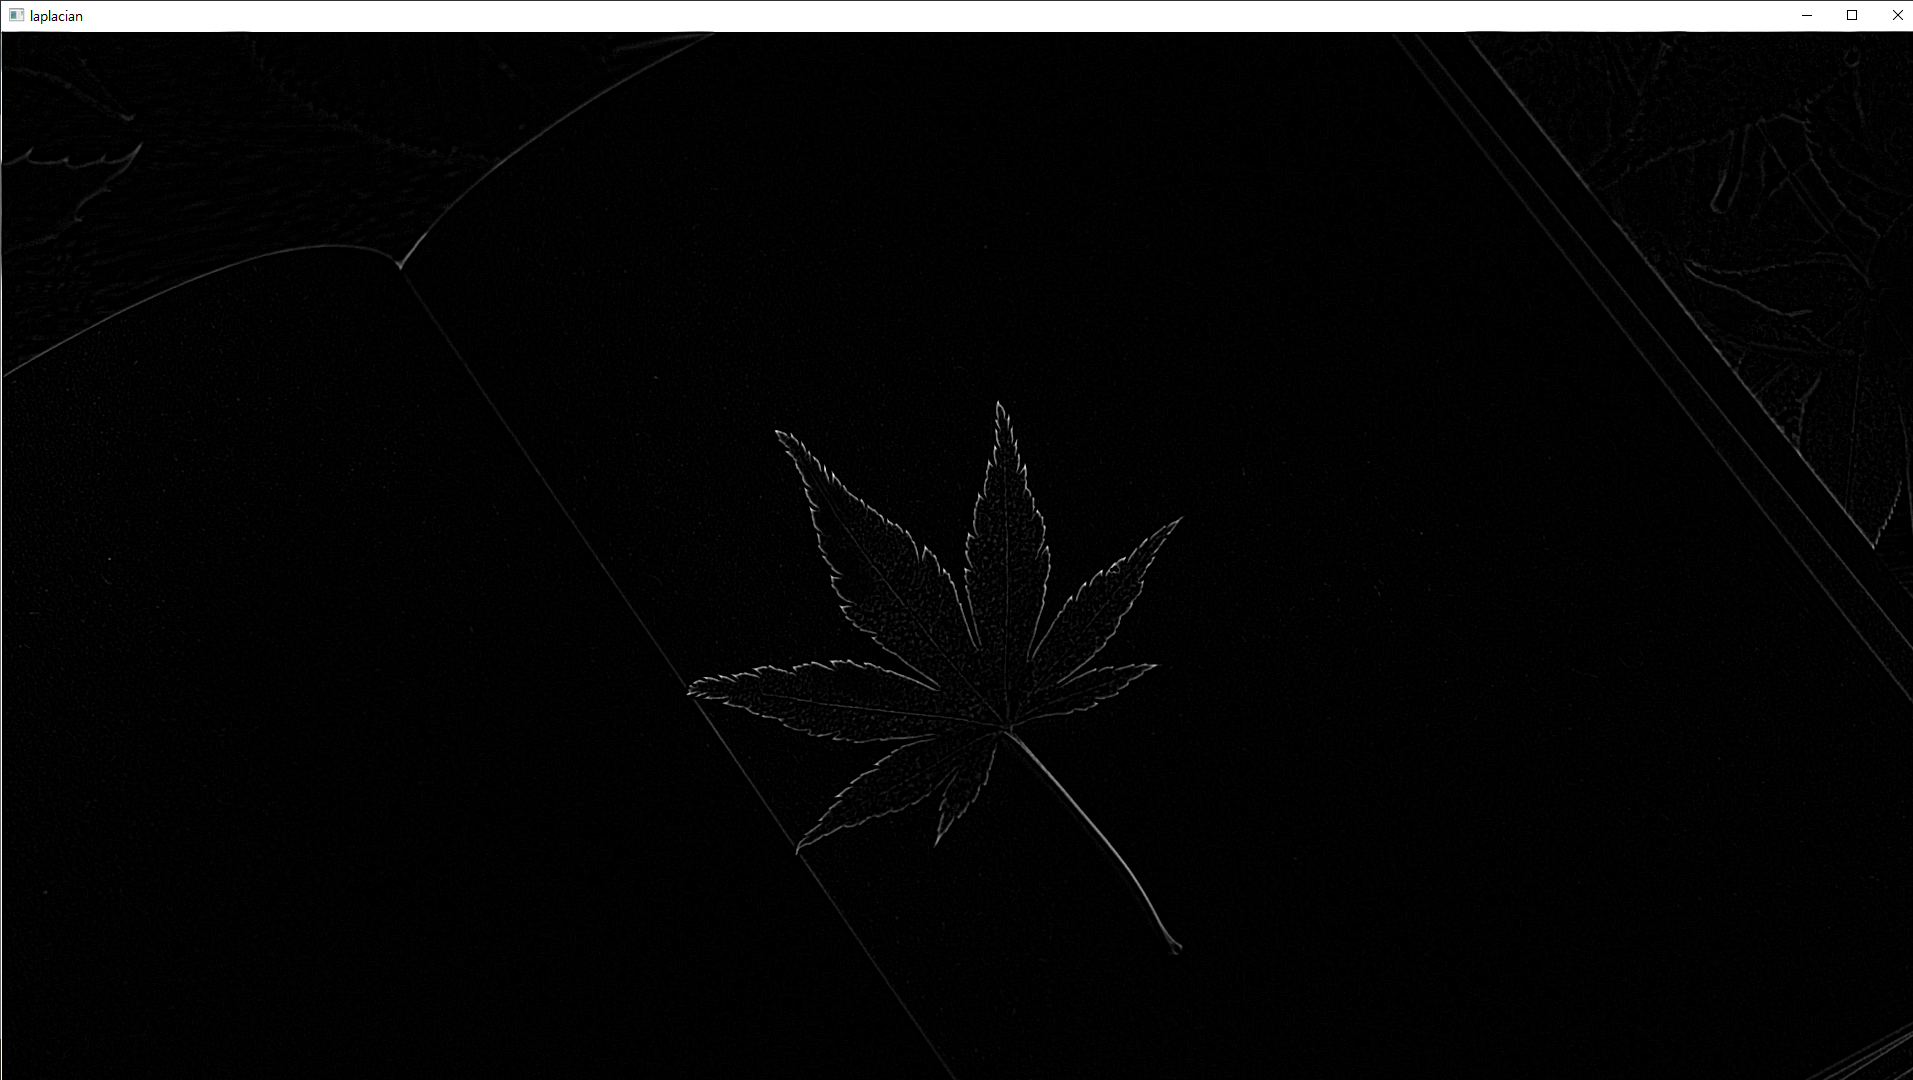
# 캐니 엣지

import numpy as np
import cv2

src = cv2.imread('book.jpg', cv2.IMREAD_GRAYSCALE)
# src = cv2.imread('car.png', cv2.IMREAD_GRAYSCALE)

dst = cv2.Canny(src, 100, 200, apertureSize=3, L2gradient=True) # apertureSize = sobel mask Size

cv2.imshow("dst", dst)

cv2.waitKey(0)
cv2.destroyAllWindows()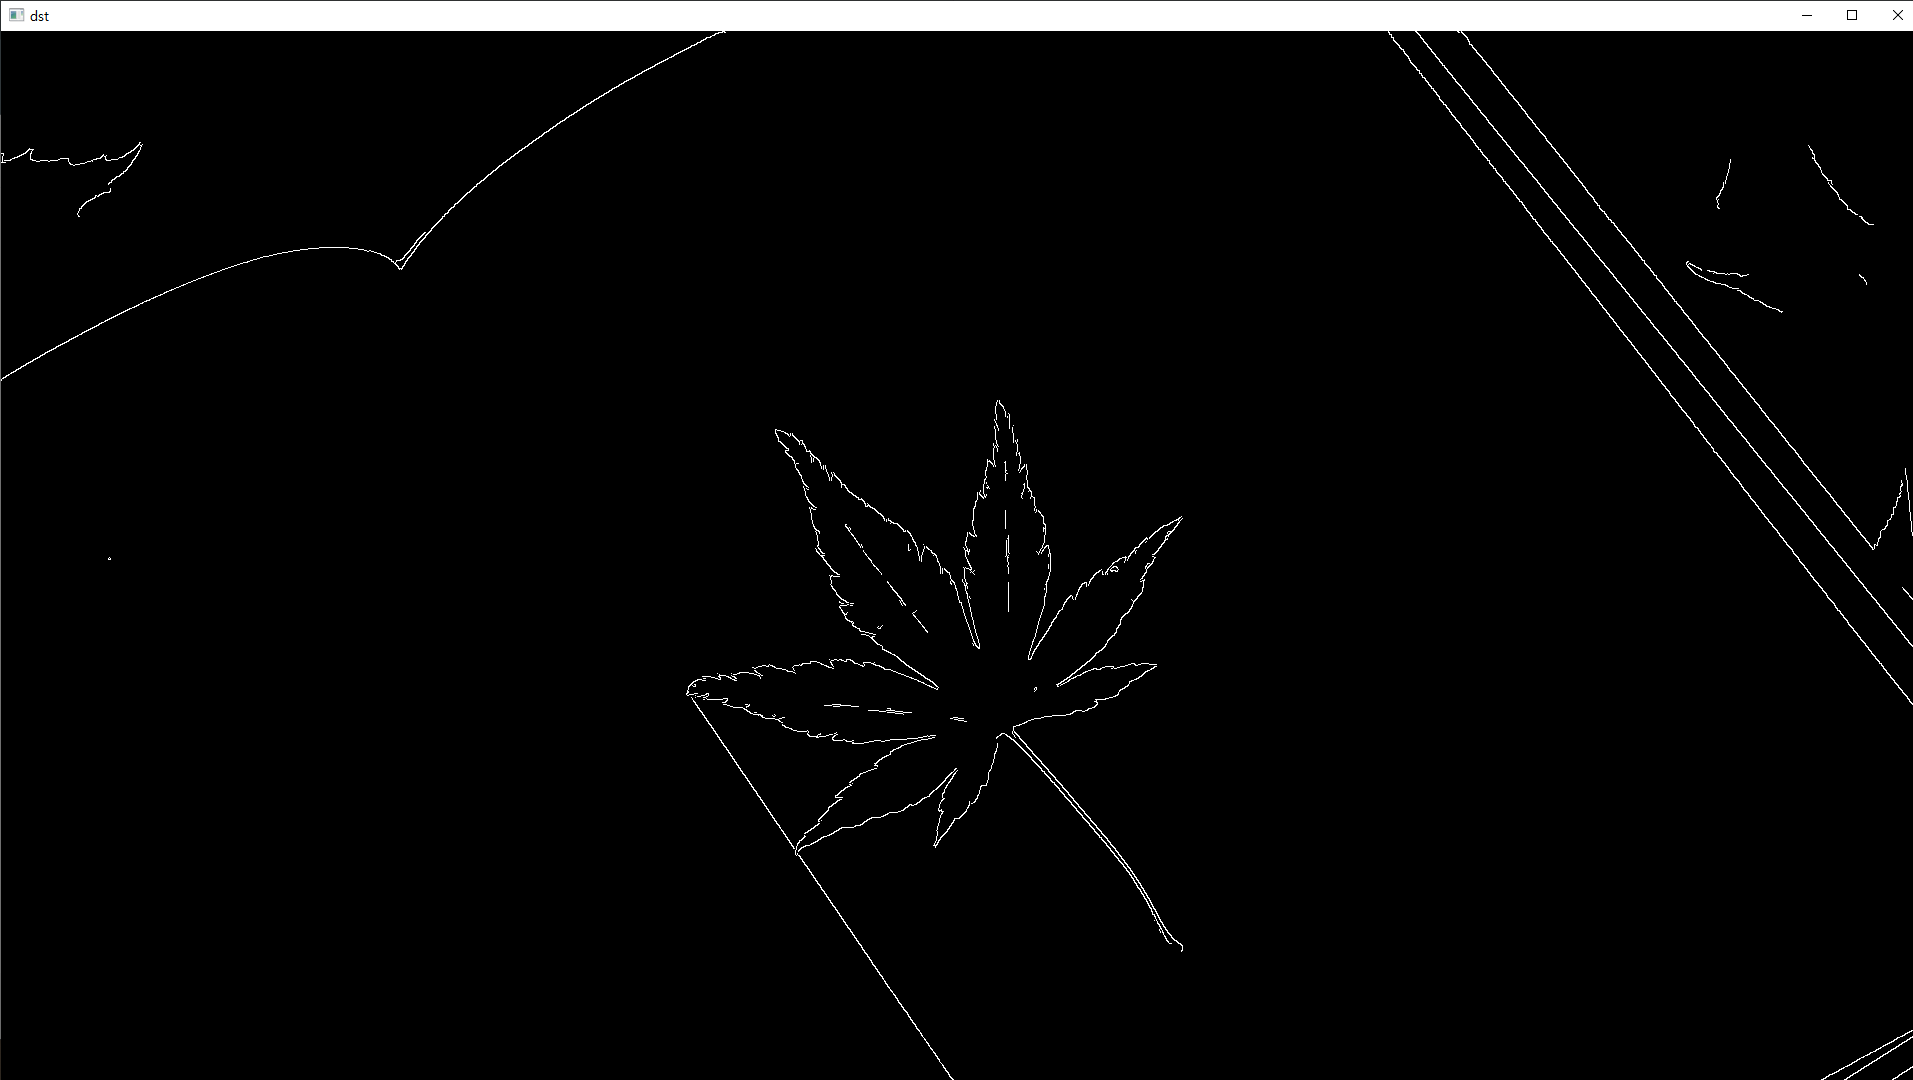
윤곽선 검출
전처리된 이미지에서 가장자리로 검출된 픽셀들을 대상으로 분류, 그룹화 함
자료구조 : satck, queue, tree
윤곽선 검출 함수
contours : 검출 윤관선들
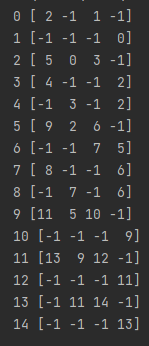
hierarchy : 계층 구조
윤곽선 그리기 함수
*.shape, type을 이용해 어떻게 생긴건지 확인하는 게 좋다
# 윤곽선 검출

import cv2

src = cv2.imread("chess.png")
dst = src.copy()

kernel = cv2.getStructuringElement(cv2.MORPH_RECT, (3, 3)) # 커널 생성

gray = cv2.cvtColor(src, cv2.COLOR_BGR2GRAY)
ret, binary = cv2.threshold(gray, 230, 255, cv2.THRESH_BINARY)
morp = cv2.morphologyEx(binary, cv2.cv2.MORPH_CLOSE, kernel, iterations=2)
image = cv2.bitwise_not(morp) # 이미지 값 반전(검은부분을 흰 부분으로, 흰 부분을 검은 부분으로)

contours, hierarchy = cv2.findContours(image, cv2.RETR_TREE, cv2.CHAIN_APPROX_NONE)
cv2.drawContours(dst, contours, -1, (0, 0, 255), 3)
for i in range(len(contours)):
    cv2.putText(dst, str(i), tuple(contours[i][0][0]), cv2.FONT_HERSHEY_COMPLEX, 1.3, (255, 0, 0), 1)
    print(i, hierarchy[0][i])

cv2.imshow("dst", dst)
cv2.waitKey(0)
cv2.destroyAllWindows()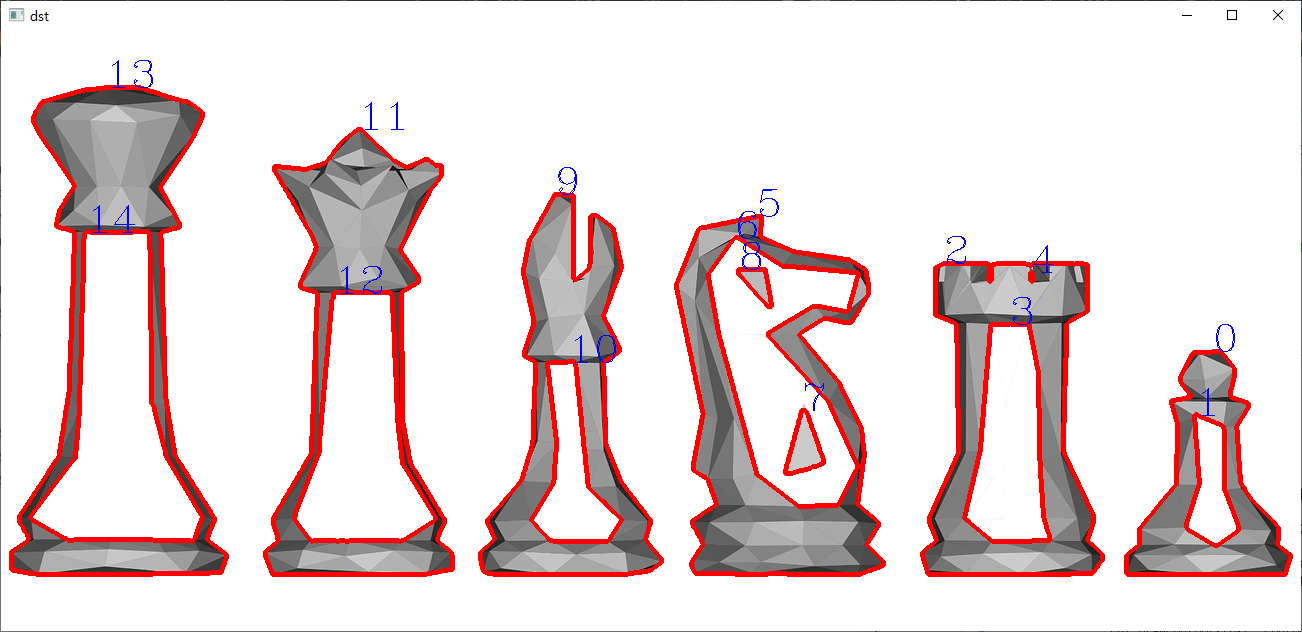
* 원본 source를 copy해서 사용하는 이유 => 원본이 변경될 위험을 방지하기 위해
다각형 근사
검출된 윤곽선에 대해 정점의 수가 적은 다각형으로 표현하는 방법
더글라스-패커 알고리즘 사용
approxCurve = cv2.approxPolyDP(curve, epslion, closed)
import cv2

src = cv2.imread("chess.png")
dst = src.copy()

kernel = cv2.getStructuringElement(cv2.MORPH_RECT, (3, 3))

gray = cv2.cvtColor(src, cv2.COLOR_BGR2GRAY)
ret, binary = cv2.threshold(gray, 230, 255, cv2.THRESH_BINARY)
morp = cv2.morphologyEx(binary, cv2.MORPH_CLOSE, kernel, iterations=2)
image = cv2.bitwise_not(morp)

contours, hierachy = cv2.findContours(image, cv2.RETR_TREE, cv2.CHAIN_APPROX_NONE)

for i in contours:
    perimeter = cv2.arcLength(i, True)
    epsilon = perimeter * 0.05 # 숫자가 커질수록 단순화됨
    approx = cv2.approxPolyDP(i, epsilon, True)
    cv2.drawContours(dst, [approx], 0, (0, 0, 255), 3)
    for j in approx:
        cv2.circle(dst, tuple(j[0]), 3, (255, 0, 0), -1)

cv2.imshow("dst", dst)
cv2.waitKey(0)
cv2.destroyAllWindows()
모멘트 함수
모멘트 함수를 통해 면적, 평균, 분사 등을 구할 수 있음
코너 검출
import cv2
import numpy as np

src = cv2.imread("dummy.jpg")
dst = src.copy()

gray = cv2.cvtColor(src, cv2.COLOR_BGR2GRAY)
corners = cv2.goodFeaturesToTrack(gray, 100, 0.01, 5, blockSize=3, useHarrisDetector=True, k=0.03)

for i in corners:
    # i = np.uint32(i) => 이걸 쓰는 게 제일 나을수도(이미 핸들링이 다 잘 만들어져있을 확률이 높기 때문)
    # cv2.circle(dst, center, 3, (255, 0, 0), 5)
    # center = tuple(i[0])
    center = (int(i[0][0])), int(i[0][1])
    cv2.circle(dst, center, 3, (255, 0, 0), 5)

criteria = (cv2.TERM_CRITERIA_MAX_ITER + cv2.TERM_CRITERIA_EPS, 30, 0.001)
# cv2.TERM_CRITERIA_MAX_ITER 이게 뭔지는 f4 누르면 확인 가능(1) / 30:반복횟수, 0.001:정확도
cv2.cornerSubPix(gray, corners, (5, 5), (-1, -1), criteria)

for i in corners:
    # i = np.uint32(i)
    # cv2.circle(dst, center, 3, (255, 0, 0), 5)
    # center = tuple(i[0])
    center = (int(i[0][0])), int(i[0][1])
    cv2.circle(dst, center, 3, (0, 0, 255), 5)

cv2.imshow("dst", dst)
cv2.waitKey(0)
cv2.destroyAllWindows()
머신러닝
인공지능>머신러닝>딥러닝
- 지도학습 : 훈련데이터(train data = input data)와 라벨(label = label data)을 포함시켜 학습하는 방법
회귀분석(regression), 분류(classification) 등이 있음
- 비지도 학습 : 라벨을 포함시키지 않고 컴퓨터가 스스로 학습하는 방법
대표적으로 군집화(Clustering)가 있음, 입력데이터의 특성을 고려해 몇개의 군집(Cluster) 또는 그룹으로 나눔
같은 그룹으로 분류된 데이터는 비슷한 성질(위치, 평균, 편차 등)을 가짐
딥러닝
여러 층(layer)을 가진 인공 신경망(ANN)을 사용해 머신러닝을 수행하는 기법
입력층 / 은닉층(알아서 함 -> 어떻게 작동하는 지 알아내는게 화두) / 출력층
fully connected(모든 노드에 다 연결되어 있음)
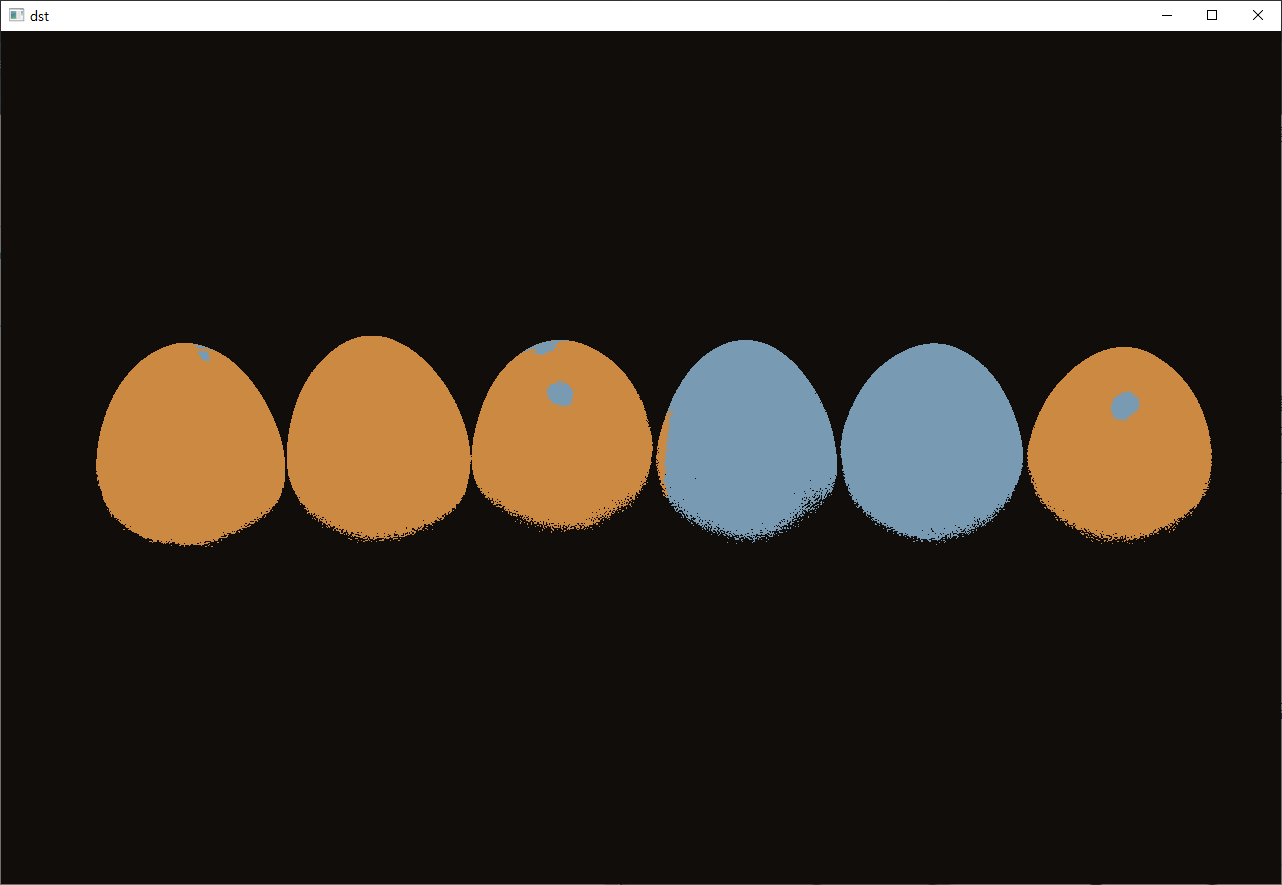
K평균 군집화 알고리즘 K-means
K(중심값) 설정
import numpy as np
import cv2

src = cv2.imread("egg.jpg")
data = src.reshape(-1, 3).astype(np.float32) # 2차원으로 만들어야해서
# reshape -1, 3 : 10x8x3 => 앞에 둘(10, 8) 곱한 값 80, 3(3은 차원)

K = 3 # K 군집 개수
criteria = (cv2.TERM_CRITERIA_MAX_ITER + cv2.TERM_CRITERIA_EPS, 10, 0.001)
retval, bestLabels, centers = cv2.kmeans(data, K, None, criteria, 10, cv2.KMEANS_RANDOM_CENTERS)

centers = centers.astype(np.uint8)
dst = centers[bestLabels].reshape(src.shape)

# print(src.shape) => 결과 : (853, 1280, 3)
# print(data.shape) => 결과 : (1091840, 3)
cv2.imshow("src", src)
cv2.imshow("dst", dst)
cv2.waitKey(0)
cv2.destroyAllWindows()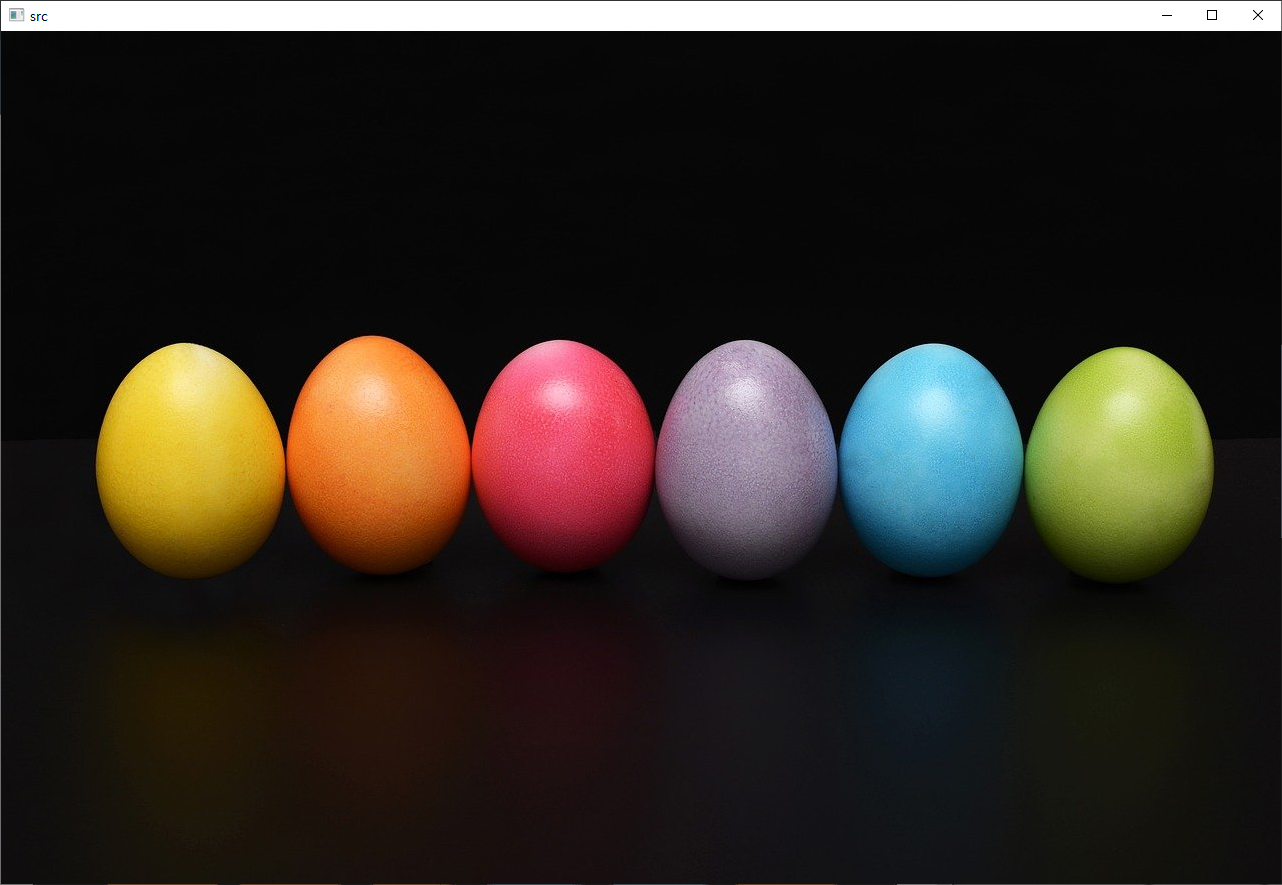
k-최근접 이웃 알고리즘
새로운 데이터가 입력 되었을 때 분류하는 기법
홀수만 넣어야함
짝수만 넣고 싶은 경우 거리별로 분류하는 등의 알고리즘을 사용해야 함
MNISTS 데이터(유명함)
import numpy as np
import cv2

def loadTrainData(image_path, label_path):
    with open(image_path, 'rb') as image_data:
        images = np.frombuffer(image_data.read(), dtype=np.uint8, offset=16).reshape(-1, 784)

    with open(label_path, 'rb') as label_data:
        labels = np.frombuffer(label_data.read(), dtype=np.uint8, offset=8)

    return images, labels

train_x, train_y = loadTrainData("./fashion-mnist/train-images-idx3-ubyte", "./fashion-mnist/train-labels-idx1-ubyte")
test_x, test_y = loadTrainData("./fashion-mnist/t10k-images-idx3-ubyte", "./fashion-mnist/t10k-labels-idx1-ubyte")

cv2.imshow("images", train_x[0].reshape(28,28,1))
cv2.waitKey(0)
cv2.destroyAllWindows()
import numpy as np
import cv2

label_dict = {
    0:"T-shirt/top",
    1:"Trouser",
    2:"Pullover",
    3:"Dress",
    4:"Coat",
    5:"Sandal",
    6:"Shirt",
    7:"Sneaker",
    8:"Bag",
    9:"Ankle boot"
}

def loadTrainData(image_path, label_path):
    with open(image_path, 'rb') as image_data:
        images = np.frombuffer(image_data.read(), dtype=np.uint8, offset=16).reshape(-1, 784)

    with open(label_path, 'rb') as label_data:
        labels = np.frombuffer(label_data.read(), dtype=np.uint8, offset=8)

    return images, labels

train_x, train_y = loadTrainData("./fashion-mnist/train-images-idx3-ubyte", "./fashion-mnist/train-labels-idx1-ubyte")
test_x, test_y = loadTrainData("./fashion-mnist/t10k-images-idx3-ubyte", "./fashion-mnist/t10k-labels-idx1-ubyte")

knn = cv2.ml.KNearest_create()
knn.train(train_x.astype(np.float32), cv2.ml.ROW_SAMPLE, train_y.astype(np.int32))

count=500
retval, results, neighborResponses, dist = knn.findNearest(test_x[:count].astype(np.float32), k=7)

for idx, result in enumerate(results):
    print("index:{}".format(idx))
    print("예측값:{}".format(label_dict[int(result)]))
    print("실젯값:{}".format(label_dict[test_y[idx]]))
    cv2.imshow("images", train_x[idx].reshape(28,28,1))
    key=cv2.waitKey(0)
    if key == ord('q') or key == 27:
        break
cv2.destroyAllWindows()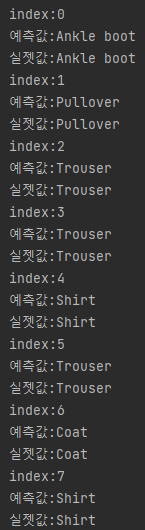
- KNearest가 뭐지? opencv 공식문서 참고
- .format()은 뭐지? 설명 참고
심층 신경망
프레임워크 : caffe, darknet, tensorflow 등
net=cv2.dnn.readNet(model, config = None, framework = None)
net : 네트워크
opencv의 심층 신경망은 순전파, 추론만 가능
텐서플로우 맛보기
import cv2
import numpy as np

config="tensorflow_model/graph.pbtxt"
model="tensorflow_model/frozen_inference_graph.pb"
with open("tensorflow_model/labelmap.txt")as file:
    classNames=file.read().splitlines()

image = cv2.imread("umbrella.jpg")
net = cv2.dnn.readNetFromTensorflow(model, config) # 텐서플로 프레임워크 읽기
inputBlob = cv2.dnn.blobFromImage(image, 1, (300,300),swapRB=True, crop=False) # 딥러닝을 위한 단일 블롭 생성

net.setInput(inputBlob) # 네트워크 입력
outputBlobs = net.forward() # 순전파 수행, 네트워크마다 출력되는 blob 구조가 다름
print(outputBlobs.shape) # 1, 1, 100, 7

for prob in outputBlobs[0,0,:,:]:
    print(prob.shape) # (7,)
    # prob [1]:class
    # prob [2] : confidence(정확도, 일치율 등)
    # prob [3.7] : x1,y1,x2,y1(blob 상자의 좌표, 상대위치)
    confidence = prob[2]
    if confidence > 0.9:
        # print(prob) # confidence가 0.9(90%)이상일 때의 prob 값
        classes = int(prob[1])
        label = classNames[classes]

        x1 = int(prob[3] * image.shape[1])
        y1 = int(prob[4] * image.shape[0])
        x2 = int(prob[5] * image.shape[1])
        y2 = int(prob[6] * image.shape[0])
        cv2.rectangle(image, (x1, y1),(x2,y2),(0,0,255))
        cv2.putText(image,label,(x1,y1),cv2.FONT_HERSHEY_COMPLEX, 1.0, (0,0,255))
cv2.imshow("image", image)
cv2.waitKey(0)
cv2.destroyAllWindows()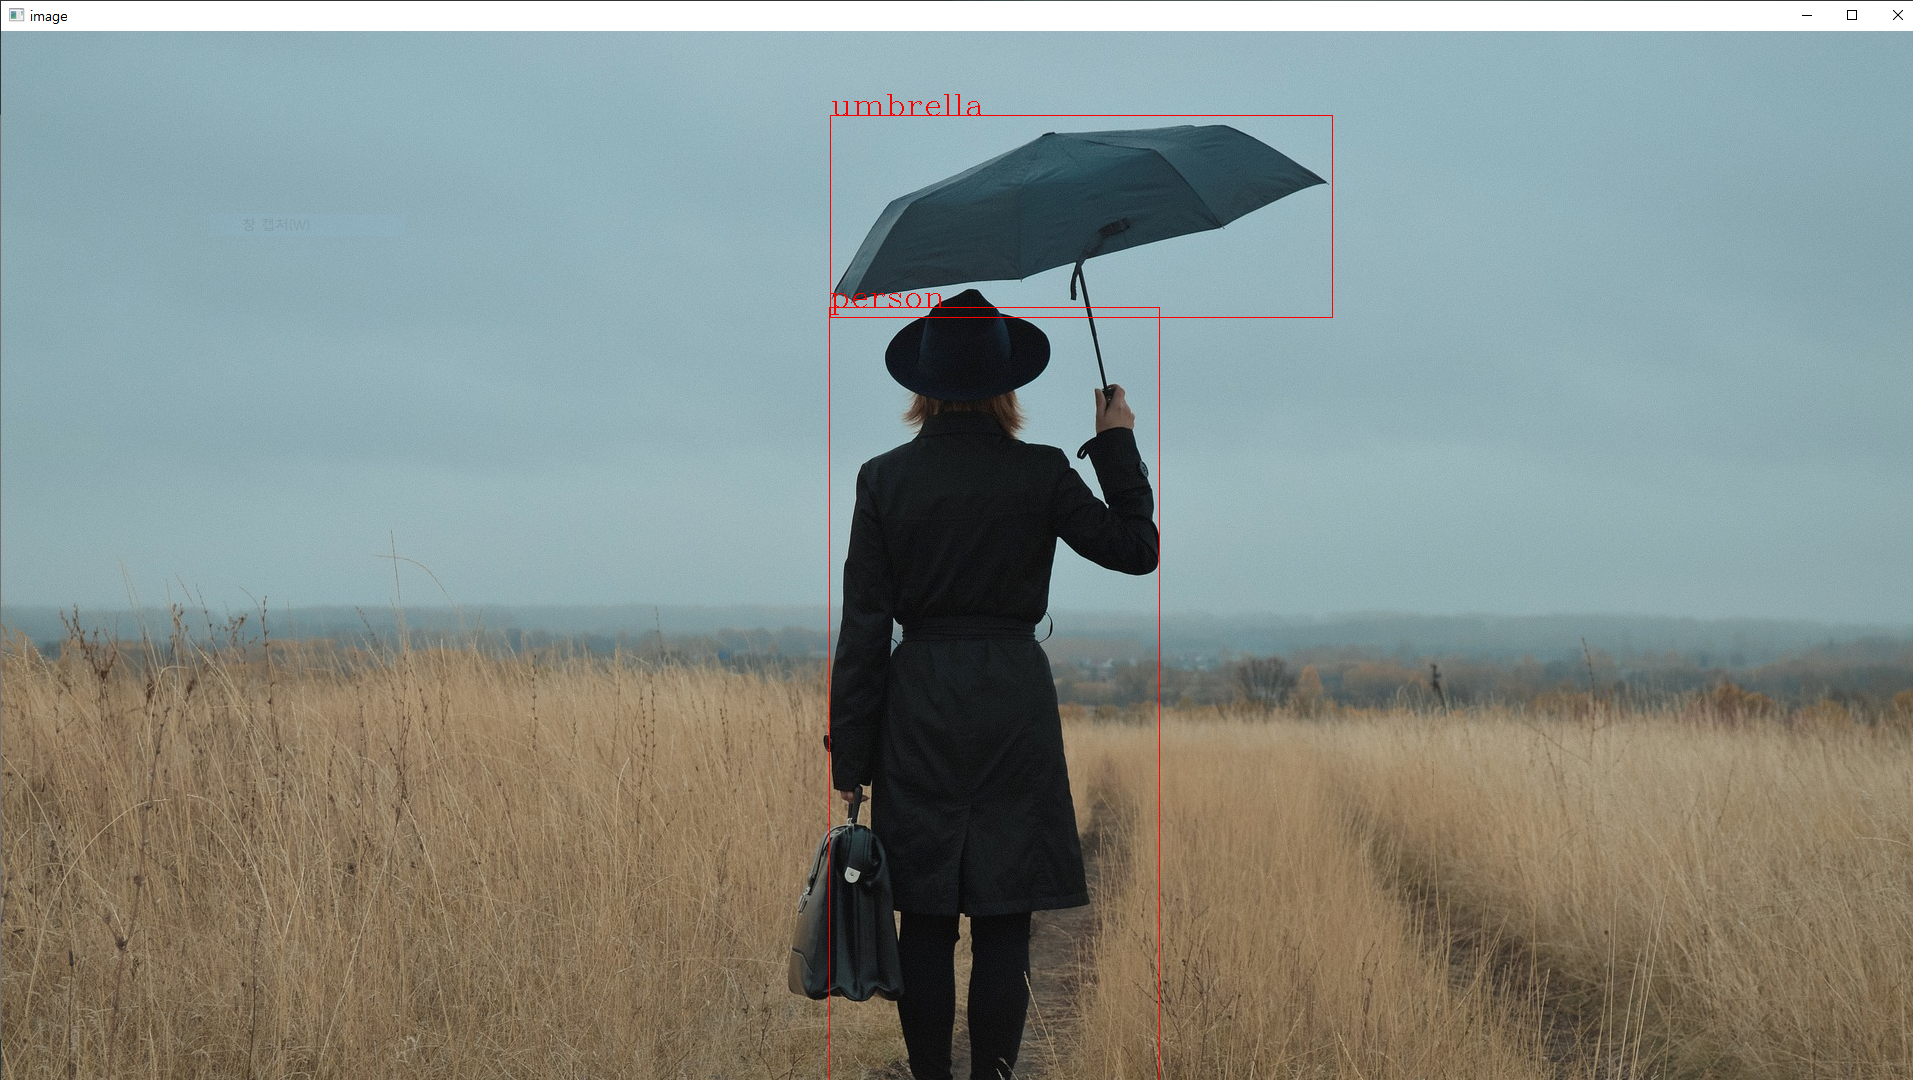
얼굴인식
FaceDetection/faceDetection.py
'''
Haar Cascade Face detection with OpenCV
    Based on tutorial by pythonprogramming.net
    Visit original post: https://pythonprogramming.net/haar-cascade-face-eye-detection-python-opencv-tutorial/
Adapted by Marcelo Rovai - MJRoBot.org @ 7Feb2018
'''

import numpy as np
import cv2

# multiple cascades: https://github.com/Itseez/opencv/tree/master/data/haarcascades
faceCascade = cv2.CascadeClassifier('Cascades/haarcascade_frontalface_default.xml')

cap = cv2.VideoCapture(0)
cap.set(3,640) # set Width
cap.set(4,480) # set Height

while True:
    ret, img = cap.read() # 프레임 하나씩 가져오기=>img에 담김, ret : 성공, 실패
    # img = cv2.flip(img, -1)
    gray = cv2.cvtColor(img, cv2.COLOR_BGR2GRAY)
    faces = faceCascade.detectMultiScale( # 이걸 써서 얼굴을 찾는다
        gray,

        scaleFactor=1.2,
        minNeighbors=5
        ,
        minSize=(20, 20)
    )

    for (x,y,w,h) in faces:
        cv2.rectangle(img,(x,y),(x+w,y+h),(255,0,0),2)
        roi_gray = gray[y:y+h, x:x+w]
        roi_color = img[y:y+h, x:x+w]


    cv2.imshow('video',img) # 수정(한단계 밖으로 빼줌)

    k = cv2.waitKey(30) & 0xff
    if k == 27: # press 'ESC' to quit
        break

cap.release()
cv2.destroyAllWindows()
FaceDetection/faceEyeDetection.py
'''
Haar Cascade Face and Eye detection with OpenCV
	Based on tutorial by pythonprogramming.net
    Visit original post: https://pythonprogramming.net/haar-cascade-face-eye-detection-python-opencv-tutorial/

Adapted by Marcelo Rovai - MJRoBot.org @ 22Feb2018
'''

import numpy as np
import cv2

# multiple cascades: https://github.com/Itseez/opencv/tree/master/data/haarcascades
faceCascade = cv2.CascadeClassifier('Cascades/haarcascade_frontalface_default.xml')
eyeCascade = cv2.CascadeClassifier('Cascades/haarcascade_eye.xml')

cap = cv2.VideoCapture(0)
cap.set(3,640) # set Width
cap.set(4,480) # set Height

while True:
    ret, img = cap.read()
    # img = cv2.flip(img, -1)
    gray = cv2.cvtColor(img, cv2.COLOR_BGR2GRAY)
    faces = faceCascade.detectMultiScale(
        gray,
        scaleFactor=1.3,
        minNeighbors=5,
        minSize=(30, 30)
    )

    for (x,y,w,h) in faces:
        cv2.rectangle(img,(x,y),(x+w,y+h),(255,0,0),2)
        roi_gray = gray[y:y+h, x:x+w]
        roi_color = img[y:y+h, x:x+w]

        eyes = eyeCascade.detectMultiScale(
            roi_gray, # 위에서 얼굴 찾음
            scaleFactor= 1.5,
            minNeighbors=10,
            minSize=(5, 5),
            )

        for (ex, ey, ew, eh) in eyes:
            cv2.rectangle(roi_color, (ex, ey), (ex + ew, ey + eh), (0, 255, 0), 2)

    cv2.imshow('video', img)

    k = cv2.waitKey(30) & 0xff
    if k == 27 or k == ord('q'): # press 'ESC' to quit
        break

cap.release()
cv2.destroyAllWindows()
FaceDetection/faceSmileEyeDetection.py
'''
Haar Cascade Face, Smile and Eye detection with OpenCV

Developed by Marcelo Rovai - MJRoBot.org @ 22Feb2018
'''

import numpy as np
import cv2

# multiple cascades: https://github.com/Itseez/opencv/tree/master/data/haarcascades
faceCascade = cv2.CascadeClassifier('Cascades/haarcascade_frontalface_default.xml')
eyeCascade = cv2.CascadeClassifier('Cascades/haarcascade_eye.xml')
smileCascade = cv2.CascadeClassifier('Cascades/haarcascade_smile.xml')

cap = cv2.VideoCapture(0)
cap.set(3,640) # set Width
cap.set(4,480) # set Height

while True:
    ret, img = cap.read()
    # img = cv2.flip(img, -1)
    gray = cv2.cvtColor(img, cv2.COLOR_BGR2GRAY)
    faces = faceCascade.detectMultiScale(
        gray,
        scaleFactor=1.3,
        minNeighbors=5,
        minSize=(30, 30)
    )

    for (x,y,w,h) in faces:
        cv2.rectangle(img,(x,y),(x+w,y+h),(255,0,0),2)
        roi_gray = gray[y:y+h, x:x+w]
        roi_color = img[y:y+h, x:x+w]

        eyes = eyeCascade.detectMultiScale(
            roi_gray,
            scaleFactor= 1.5,
            minNeighbors=5,
            minSize=(5, 5),
            )

        for (ex, ey, ew, eh) in eyes:
            cv2.rectangle(roi_color, (ex, ey), (ex + ew, ey + eh), (0, 255, 0), 2)


        smile = smileCascade.detectMultiScale(
            roi_gray,
            scaleFactor= 1.5,
            minNeighbors=15,
            minSize=(25, 25),
            )

        for (xx, yy, ww, hh) in smile:
            cv2.rectangle(roi_color, (xx, yy), (xx + ww, yy + hh), (0, 255, 0), 2)

    cv2.imshow('video', img)

    k = cv2.waitKey(30) & 0xff
    if k == 27: # press 'ESC' to quit
        break

cap.release()
cv2.destroyAllWindows()
FaceDetection/faceSmileDetection.py
'''
Haar Cascade Face and Smile detection with OpenCV

Developed by Marcelo Rovai - MJRoBot.org @ 22Feb2018
'''

import numpy as np
import cv2

# multiple cascades: https://github.com/Itseez/opencv/tree/master/data/haarcascades
faceCascade = cv2.CascadeClassifier('Cascades/haarcascade_frontalface_default.xml')
smileCascade = cv2.CascadeClassifier('Cascades/haarcascade_smile.xml')

cap = cv2.VideoCapture(0)
cap.set(3,640) # set Width
cap.set(4,480) # set Height

while True:
    ret, img = cap.read()
    # img = cv2.flip(img, -1)
    gray = cv2.cvtColor(img, cv2.COLOR_BGR2GRAY)
    faces = faceCascade.detectMultiScale(
        gray,
        scaleFactor=1.3,
        minNeighbors=5,
        minSize=(30, 30)
    )

    for (x,y,w,h) in faces:
        cv2.rectangle(img,(x,y),(x+w,y+h),(255,0,0),2)
        roi_gray = gray[y:y+h, x:x+w]
        roi_color = img[y:y+h, x:x+w]

        smile = smileCascade.detectMultiScale(
            roi_gray,
            scaleFactor= 1.5,
            minNeighbors=15,
            minSize=(25, 25),
            )

        for (xx, yy, ww, hh) in smile:
            cv2.rectangle(roi_color, (xx, yy), (xx + ww, yy + hh), (0, 255, 0), 2)

    cv2.imshow('video', img)

    k = cv2.waitKey(30) & 0xff
    if k == 27: # press 'ESC' to quit
        break

cap.release()
cv2.destroyAllWindows()
FacialRecognition/01_face_dataset.py
''''
Capture multiple Faces from multiple users to be stored on a DataBase (dataset directory)
	==> Faces will be stored on a directory: dataset/ (if does not exist, pls create one)
	==> Each face will have a unique numeric integer ID as 1, 2, 3, etc

Based on original code by Anirban Kar: https://github.com/thecodacus/Face-Recognition

Developed by Marcelo Rovai - MJRoBot.org @ 21Feb18

'''

import cv2
import os

cam = cv2.VideoCapture(0)
cam.set(3, 640) # set video width
cam.set(4, 480) # set video height

face_detector = cv2.CascadeClassifier('haarcascade_frontalface_default.xml')

# For each person, enter one numeric face id
face_id = input('\n enter user id end press <return> ==>  ')

print("\n [INFO] Initializing face capture. Look the camera and wait ...")
# Initialize individual sampling face count
count = 0

while(True):
    ret, img = cam.read()
    # img = cv2.flip(img, -1) # flip video image vertically
    gray = cv2.cvtColor(img, cv2.COLOR_BGR2GRAY)
    faces = face_detector.detectMultiScale(gray, 1.3, 5)

    for (x,y,w,h) in faces:

        cv2.rectangle(img, (x,y), (x+w,y+h), (255,0,0), 2)
        count += 1 # 얼굴을 찾을때마다 1씩 증가

        # Save the captured image into the datasets folder
        # 로직 따라가기 User.1.0.jpg(id/count순)
        # User.1.1.jpg
        # ...
        # User.1.30.jpg
        cv2.imwrite("dataset/User." + str(face_id) + '.' + str(count) + ".jpg", gray[y:y+h,x:x+w])

    cv2.imshow('image', img)

    k = cv2.waitKey(100) & 0xff # Press 'ESC' for exiting video
    if k == 27:
        break
    elif count >= 30: # Take 30 face sample and stop video
        break

# Do a bit of cleanup
print("\n [INFO] Exiting Program and cleanup stuff")
cam.release()
cv2.destroyAllWindows()=> 100ms마다 총 30장의 얼굴을 저장한다.
FacialRecognition/02_face_training.py
''''
Training Multiple Faces stored on a DataBase:
	==> Each face should have a unique numeric integer ID as 1, 2, 3, etc
	==> LBPH computed model will be saved on trainer/ directory. (if it does not exist, pls create one)
	==> for using PIL, install pillow library with "pip install pillow"

Based on original code by Anirban Kar: https://github.com/thecodacus/Face-Recognition

Developed by Marcelo Rovai - MJRoBot.org @ 21Feb18

'''

import cv2
import numpy as np
from PIL import Image
import os

# Path for face image database
path = 'dataset'

recognizer = cv2.face.LBPHFaceRecognizer_create()
detector = cv2.CascadeClassifier("haarcascade_frontalface_default.xml");

# function to get the images and label data
def getImagesAndLabels(path):

    imagePaths = [os.path.join(path,f) for f in os.listdir(path)]
    faceSamples=[]
    ids = []

    for imagePath in imagePaths:

        PIL_img = Image.open(imagePath).convert('L') # convert it to grayscale
        img_numpy = np.array(PIL_img,'uint8')

        id = int(os.path.split(imagePath)[-1].split(".")[1])
        faces = detector.detectMultiScale(img_numpy)

        for (x,y,w,h) in faces:
            faceSamples.append(img_numpy[y:y+h,x:x+w])
            ids.append(id)

    return faceSamples,ids

print ("\n [INFO] Training faces. It will take a few seconds. Wait ...")
faces,ids = getImagesAndLabels(path)
recognizer.train(faces, np.array(ids))

# Save the model into trainer/trainer.yml
recognizer.write('trainer/trainer.yml') # recognizer.save() worked on Mac, but not on Pi

# Print the numer of faces trained and end program
print("\n [INFO] {0} faces trained. Exiting Program".format(len(np.unique(ids))))
- 추가설치 : pip install image(image 모듈을 위해 설치했으나 에러로 인해 uninstall 하고 pillow 설치함(근데 pillow는 이미 설치 완료였음)
pip install opencv-contrib-python
- 오류 : error: (-2:Unspecified error) File can't be opened for writing! in function 'cv::face::FaceRecognizer::write'
=> trainer 파일이 존재하지 않아 발생함. 폴더 생성하니 해결 됨
FacialRecognition/03_face_recognition.py
''''
Real Time Face Recogition
	==> Each face stored on dataset/ dir, should have a unique numeric integer ID as 1, 2, 3, etc
	==> LBPH computed model (trained faces) should be on trainer/ dir
Based on original code by Anirban Kar: https://github.com/thecodacus/Face-Recognition

Developed by Marcelo Rovai - MJRoBot.org @ 21Feb18

'''

import cv2
import numpy as np
import os

recognizer = cv2.face.LBPHFaceRecognizer_create()
recognizer.read('trainer/trainer.yml')
cascadePath = "haarcascade_frontalface_default.xml"
faceCascade = cv2.CascadeClassifier(cascadePath); # 얼굴을 인식하는 cascade 만들었음

font = cv2.FONT_HERSHEY_SIMPLEX

#iniciate id counter
id = 0

# names related to ids: example ==> Marcelo: id=1,  etc
names = ['None', 'JAY', 'Paula', 'Ilza', 'Z', 'W']

# Initialize and start realtime video capture
cam = cv2.VideoCapture(0)
cam.set(3, 640) # set video widht
cam.set(4, 480) # set video height

# Define min window size to be recognized as a face
minW = 0.1*cam.get(3)
minH = 0.1*cam.get(4)

while True:

    ret, img =cam.read()
    # img = cv2.flip(img, -1) # Flip vertically

    gray = cv2.cvtColor(img,cv2.COLOR_BGR2GRAY)

    faces = faceCascade.detectMultiScale(
        gray,
        scaleFactor = 1.2,
        minNeighbors = 5,
        minSize = (int(minW), int(minH)),
       )

    for(x,y,w,h) in faces:

        cv2.rectangle(img, (x,y), (x+w,y+h), (0,255,0), 2)

        id, confidence = recognizer.predict(gray[y:y+h,x:x+w])

        # Check if confidence is less them 100 ==> "0" is perfect match
        if (confidence < 100):
            id = names[id]
            confidence = "  {0}%".format(round(100 - confidence))
        else:
            id = "unknown"
            confidence = "  {0}%".format(round(100 - confidence))

        cv2.putText(img, str(id), (x+5,y-5), font, 1, (255,255,255), 2)
        cv2.putText(img, str(confidence), (x+5,y+h-5), font, 1, (255,255,0), 1)

    cv2.imshow('camera',img)

    k = cv2.waitKey(10) & 0xff # Press 'ESC' for exiting video
    if k == 27:
        break

# Do a bit of cleanup
print("\n [INFO] Exiting Program and cleanup stuff")
cam.release()
cv2.destroyAllWindows()
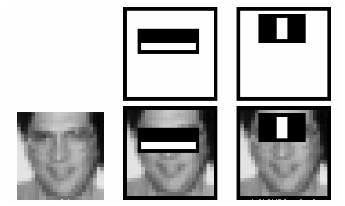
Haar Cascades 원리
느낀 점
자료구조 공부해야할듯(필수)
흥미 있으면 지금 배운 걸로 숨은 그림 찾기 같은 건 만들 수 있음
강사님 같은 경우엔 게임 데미지 계산 하는 프로그램을 만드셨다 하는데 신기하다.
만들고 싶은게 있으면 github에 검색해서 찾아볼 것
머신 러닝은 확실히 쉽지 않은 분야인 것 같다.(물론 처음 접해서 더욱 그렇게 느껴지겠지만) 근데 그만큼 신기하기도 하다.
예전에 본 다큐에서 ai의 진화에 대해 간단하게 다룬 내용이 인상 깊었는데, 인간이 ai를 가르치는 게 아닌, ai가 ai를 가르치게 되면(인간의 역할이 점차 줄어들고 마침내 ai끼리만 서로를 통해 발전하게 되면) 전세계적인 기아 문제, 기후 문제 등에 대해 인간은 상상도 못할 해결책을 내놓을 수 있을지도 모른다는 내용이었다.(개인적으로 너무 낙관적이기만 한 시각 아닌가? 하는 생각이 들긴 했다.)
그에 생각나 찾아본 칼럼이다.
읽고 나니 한 가지는 알 것 같다. 온갖 불확실 속에서 확실한 건, 인간은 미래를 절대 예측할 수 없으리라는 것이다.
그리고 그만큼 ai, 딥러닝은 정말 매력적인 분야라는 것도 알 것 같다.
오렐리O'REILLY 책 추천 받았다(미국에서 유명한 IT전문 책 출판하는 곳)
멍멍이 얼굴 인식 오픈소스도 찾았다.
'공부 > Digital Twin Bootcamp' 카테고리의 다른 글
| TIL_210105_Backend (0) | 2022.01.05 |
|---|---|
| TIL_220104_Vision 인식 (1) | 2022.01.04 |
| TIL_211231_Vision 인식 (0) | 2021.12.31 |
| TIL_211230_VISION 인식 (0) | 2021.12.30 |
| TIL_211229_VISION 인식 (0) | 2021.12.29 |