
다중 Thread
import threading
import time

flag_exit = False
def t1_main():
  while True: # 계속 반복
    print("\tt1") # 탭, t1 문자열 출력 후
    time.sleep(0.5) # 0.5초 기다림
    if flag_exit: break # flag_exit 값이 True면 while문을 빠져나온 후 종료

def t2_main():
  while True:
    print("\t\tt2") # 탭, 탭, t2 문자열 출력
    time.sleep(0.2)
    if flag_exit: break

t1 = threading.Thread(target=t1_main) # t1_main 함수를 수행할 t1 쓰레드 생성
t1.start()

t2 = threading.Thread(target=t2_main) # t2_main 함수를 수행할 t2 쓰레드 생성
t2.start()

try:
  while True:
    userInput = input()
    print(userInput) # 사용자 입력을 출력

except KeyboardInterrupt:
  pass

flag_exit = True
t1.join()
t2.join()

쓰레드로 LED 점멸 반복
import threading
import time
import RPi.GPIO as GPIO

led_pin = 17

flag_exit = False
def blink_led(): # 쓰레드가 수행할 blink_led 함수
  while True:
    GPIO.output(led_pin, True)
    time.sleep(0.5)
    GPIO.output(led_pin, False)
    time.sleep(0.5)

    if flag_exit: break

GPIO.setmode(GPIO.BCM)
GPIO.setup(led_pin, GPIO.OUT)

tBL = threading.Thread(target=blink_led) # blink_led 함수를 수행할 tBL 쓰레드 하나 생성
tBL.start() # tBL 객체에 대해 start 함수 호출, 쓰레드를 수행 가능한 상태로 변경

try:
  while True:
    print("main") # main 문자열 출력
    time.sleep(1.0)

except KeyboardInterrupt:
  pass

flag_exit = True
tBL.join()결과
주 루틴: 1초에 한번씩 main 문자열 출력, blink_led: 1초 주기로 led 점멸 반복
주 루틴은 파이썬 쉘에 의해 수행
blink_led 함수는 threading.Thread 클래스에 의해 생성된 tBL 쓰레드에 의해 수행
플라스크 웹서버 Flask Web Server
라즈베리파이 네트워크 설정
Terminal에서 진행
sudo nano /etc/dhcpcd.conf # 라즈베리파이 네트워크 설정 변경 config 파일맨 밑에 아래 내용 추가(오타 주의)
interface eth0
static ip_address=192.168.138.100
static routers=192.168.138.1
static domain_name_servers=192.168.138.1 8.8.8.8
static netmask=255.255.255.0cat으로 파일 내용 확인
cat /etc/dhcpcd.conf라즈베리파이 재부팅
sudo reboot # 재부팅
Flask (Micro Web Framework)
장점
쉽게 배울 수 있음 Python, HTML+CSS+Javascript
가볍게 사용 가능(코드 몇줄이면 됨)
가볍게 배포할 수 있음(virtualeny에 Flask 깔고 바로 배포하면 됨)
단점
Django에 비해 자유도는 높으나 제공해 주는 기능이 덜 함
복잡한 어플리케이션을 만드려고 할 때 해야 할 것들이 많음
=> 완전한 웹 서버보단 파이썬에서 간단하게 웹 서버 기능을 해주는 웹 프레임워크
Flask 설치
sudo apt-get install python3-flask
\webFlask\index.py
플라스크를 이용한 웹서버 구축 참고
from flask import Flask

app = Flask(__name__)

@app.route('/')
def hello():
  return 'Hello Flask'

# main을 직접 실행하는 코드 => 파이썬 명령어로 실행 가능
if __name__== '__main__':
  app.run(debug=True, port=80, host='0.0.0.0')
  # 디버그: 변화 감지, 포트는 디폴트가 80, 호스트 0.0.0.0는 본인 아이피라는 뜻(=로컬호스트=127.0.0.1)

플라스크 웹 서버 기본 구조

서브 페이지 추가
from flask import Flask

app = Flask(__name__)

@app.route('/')
def hello():
  return 'Hello Flask'

@app.route('/sub1') # 서브페이지 1 추가
def sub1():
  return 'SUB1 page'

@app.route('/sub2') # 서브페이지 2 추가
def sub2():
  return 'SUB2 page'

# main을 직접 실행하는 코드 => 파이썬 명령어로 실행 가능
if __name__== '__main__':
  app.run(debug=True, port=80, host='0.0.0.0')
# 디버그: 변화 감지, 포트는 디폴트가 80, 호스트 0.0.0.0는 본인 아이피라는 뜻(=로컬호스트=127.0.0.1)
HTML 페이지 작성하기
html 파일 작성
\webFlask\templates\test_html.html
<html>
  <head>
    <title>
      Flask html test page
    </title>
  </head>
<body>
  <center>
    <br>
    <strong>라즈베리 파이 플라스크 테스트 페이지</strong>
  </br>
  <img = src="static/pi.png"
  </center>
</body>
</html>
이미지 static 폴더에 삽입

인덱스에 html 파일 삽입
\webFlask\index.py
from flask import Flask, render_template

app = Flask(__name__)

@app.route('/')
def index():
  return render_template('test_html.html')

@app.route('/sub1') # 서브페이지 1 추가
def sub1():
  return 'SUB1 page'

@app.route('/sub2') # 서브페이지 2 추가
def sub2():
  return 'SUB2 page'

# main을 직접 실행하는 코드 => 파이썬 명령어로 실행 가능
if __name__== '__main__':
  app.run(debug=True, port=80, host='0.0.0.0')
# 디버그: 변화 감지, 포트는 디폴트가 80, 호스트 0.0.0.0는 본인 아이피라는 뜻(=로컬호스트=127.0.0.1)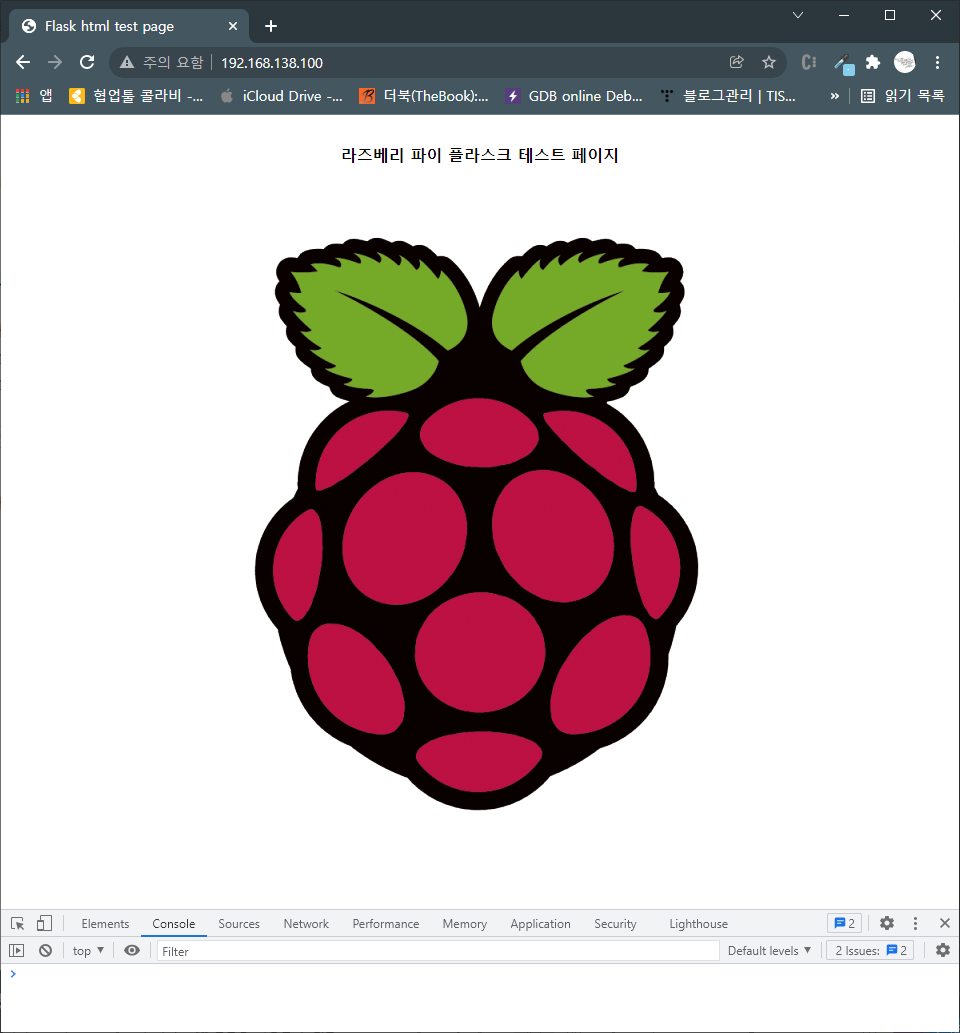
Get, Post
웹 클라이언트에서 웹서버로 파라미터를 넘겨 줄 수 있는 방식
Get 방식
웹 브라우저의 URL에 파라미터를 설정해서 웹 서버로 전송하는 방식
from flask import Flask, render_template, request

app = Flask(__name__)

@app.route('/method', methods=['GET'])
def method(): # 웹서버에 있는 method 함수 호출
  if request.method == 'GET':
    id = request.args["id"] # 파라미터 id
    password = request.args.get("password") # 파라미터 password
  return "get으로 전달된 데이터 ({}, {})" .format(id, password)

@app.route('/')
def index():
  return render_template('test_html.html')

@app.route('/sub1')
def sub1():
  return 'SUB1 page'

@app.route('/sub2')
def sub2():
  return 'SUB2 page'

if __name__=='__main__':
  app.run(debug=True, port=80, host='0.0.0.0')
결과 설명
URL 통해서 파라미터 전달하는 방법
?로 시작하고 id=test 형식으로 전송
파라미터 여러 개는 &로 구분
위의 방법은 불편하기 때문에 html 파일을 통해 요청
html 파일 작성
\webFlask\templates\method_get.html
<html>
  <head>
    <title>
      get 방식 요청 테스트
    </title>
  </head>
  <body>
    <h2>ID: {{id}} , PASSWORD: {{password}}</h2>
    <form method="get" action="/method_get_act">
      <label id="Label1">id</label>
      <input name="id" type="text"/>
      <br/>
      <label id="Label2">password</label>
      <input name="password" type"text"/>
      <br/>
      <br/>
      <input name="Submit1" type="submit" value="submit"/>
    </form>
  </body>
</html>
인덱스 파일 작성
\webFlask\method_get.py
from flask import Flask, render_template, request

app = Flask(__name__)

@app.route('/method_get', methods=['GET'])
def method_get():
  return render_template('method_get.html')

@app.route('/method_get_act', methods=['GET'])
def method_get_act():
  if request.method == 'GET':
    id_param = request.args["id"] # {{id}}가 html 파일에서 input으로 들어옴
    password_param = request.args.get("password") # {{password}}html 파일에서 input으로 들어옴
    return render_template('method_get.html', id=id_param, password=password_param)

if __name__=='__main__':
  app.run(debug=True, port=80, host='0.0.0.0')

=> url에 그대로 노출되기 때문에 보안상 굉장히 위험하므로 post를 사용
post 방식
post 방식은 url에 파라미터를 통한 요청을 하지 않는다.
html 파일 작성
\webFlask\templates\method_post.html
<html>
  <head>
    <title>
      post 방식 요청 테스트
    </title>
  </head>
  <body>
    <h2>ID: {{id}} , PASSWORD: {{password}}</h2>
    <form method="post" action="/method_post_act">
      <label id="Label1">id</label>
      <input name="id" type="text"/>
      <br/>
      <label id="Label2">password</label>
      <input name="password" type"text"/>
      <br/>
      <br/>
      <input name="Submit1" type="submit" value="submit"/>
    </form>
  </body>
</html>
인덱스 파일 작성
\webFlask\method_post.py
from flask import Flask, render_template, request

app = Flask(__name__)

@app.route('/method_post', methods=['GET', 'POST'])
def method_post():
  return render_template('method_post.html')

@app.route('/method_post_act', methods=['GET', 'POST'])
def method_post_act():
  if request.method == 'POST':
    id_param = request.form["id"] # {{id}}가 html 파일에서 input으로 들어옴
    password_param = request.form["password"] # {{password}}html 파일에서 input으로 들어옴
    return render_template('method_post.html', id=id_param, password=password_param)

if __name__=='__main__':
app.run(debug=True, port=80, host='0.0.0.0')결과


웹 GPIO 제어하기
플라스크 + HTML 사용하여 원격 led on/off 해보기
html 파일 설정
\webFlask\templates\led_control.html
<html>
  <head>
    <title>
      Web LED Control
    </title>
  </head>
  <body>
    <center>
      <br>
      <strong>HOME IOT Service</strong>
      </br>

      <table style="width:50%">
      <tr>
        <td class="auto-style6" style="height: 81; width: 30%">
        <strong>
          <a href="led_control_act?led=1"> LED 켜기 </a>
        </strong>
      </td>
      <td class="auto-style6" style="height: 81; width: 30%">
        <strong>
          <a href="led_control_act?led=2"> LED 끄기 </a>
        </strong>
      </td>
      </tr>
    </table>
    <br/>
    <strong>LED is {{ret}}</strong>
    </center>
  </body>
</html>

<style type="text/css">
  .auto-style6{
    border-style: solid;
    border-color: #000000;
    text-align: center;
    color: #ffffff;
    background-color: #FF9900;
  }
</style>
인덱스 파일 설정
\webFlask\templates\led_control.py
from flask import Flask, render_template, request
import RPi.GPIO as GPIO
from flask.templating import render_template_string

LED = 17
GPIO.setmode(GPIO.BCM)
GPIO.setup(LED, GPIO.OUT)

app = Flask(__name__)

@app.route('/led_control')
def led_control():
  return render_template('led_control.html')

@app.route('/led_control_act', methods=['GET'])
def led_control_act():
  if request.method == 'GET':
    status = ''
    led = request.args["led"]
    if led == '1':
      GPIO.output(LED, True)
      status = 'ON'
    else:
      GPIO.output(LED, False)
      status = 'OFF'
  return render_template('led_control.html', ret = status)

if __name__=='__main__':
app.run(debug=True, port=80, host='0.0.0.0')결과


부트스트랩
다운로드
Bootstrap
The most popular HTML, CSS, and JS library in the world.
getbootstrap.com

라즈베리파이에 static 폴더에 압축을 푼 내용 (css, js 폴더) 삽입

html 파일 수정
\webFlask\templates\led_control.html
<html>
  <head>
    <link rel="stylesheet" type="text/css" href="/static/css/bootstrap.min.css"
    <title>
      Web LED Control
    </title>
  </head>
  <body>
    <center>
      <br>
      <strong>HOME IOT Service</strong>
      </br>

      <table style="width:50%">
      <tr>
        <td class="auto-style6" style="height: 81; width: 30%">
        <strong>
          <a class="btn btn-success" href="led_control_act?led=1"> LED 켜기 </a>
        </strong>
      </td>
      <td class="auto-style6" style="height: 81; width: 30%">
        <strong>
          <a class="btn btn-danger" href="led_control_act?led=2"> LED 끄기 </a>
        </strong>
      </td>
      </tr>
    </table>
    <br/>
    <strong>LED is {{ret}}</strong>
    </center>
  </body>
</html>

<style type="text/css">
  .auto-style6{
    border-style: solid;
    border-color: #000000;
    text-align: center;
    color: #ffffff;
    background-color: #FF9900;
  }
</style>
Card 추가
html 파일 수정
\webFlask\templates\led_control.html
<html>
  <head>
    <link rel="stylesheet" type="text/css" href="/static/css/bootstrap.min.css"
    <title>
      Web LED Control
    </title>
  </head>
  <body>
    <center>
      <br>
      <strong>HOME IOT Service</strong>
      </br>

      <table style="width:50%">
      <tr>
        <td class="auto-style6" style="height: 81; width: 30%">
        <strong>
          <a class="btn btn-success" href="led_control_act?led=1"> LED 켜기 </a>
        </strong>
      </td>
      <td class="auto-style6" style="height: 81; width: 30%">
        <strong>
          <a class="btn btn-danger" href="led_control_act?led=2"> LED 끄기 </a>
        </strong>
      </td>
      </tr>
    </table>
    <br/>
    <div class="card" style="width: 18rem;">
      {% if ret == 'ON' %} <!-- html 조건문 -->
      <img src="static/on.PNG" class="card-img-top">
      {% elif ret == 'OFF' %} <!-- html 조건문 -->
      <img src="static/off.PNG" class="card-img-top">
      {% endif %} <!-- html 조건문 -->
      <div class="card-body">
        <hs class="card-title">title</hs>
        <p class="card-text"> LED is {{ret}}</p>
        <strong>LED is {{ret}}</strong>
      </div>
    </div>
    </center>
  </body>
</html>

<style type="text/css">
  .auto-style6{
    border-style: solid;
    border-color: #000000;
    text-align: center;
    color: #ffffff;
    background-color: #FF9900;
  }
</style>

Chart.js

2.8.0 버전(설명이 좀 더 쉬움)
https://www.chartjs.org/docs/2.8.0/getting-started/
<script src="https://cdn.jsdelivr.net/npm/chart.js@2.8.0"></script>3.7.0 버전
<canvas id="myChart" width="400" height="400"></canvas>
<script>
const ctx = document.getElementById('myChart').getContext('2d');
const myChart = new Chart(ctx, {
    type: 'bar',
    data: {
        labels: ['Red', 'Blue', 'Yellow', 'Green', 'Purple', 'Orange'],
        datasets: [{
            label: '# of Votes',
            data: [12, 19, 3, 5, 2, 3],
            backgroundColor: [
                'rgba(255, 99, 132, 0.2)',
                'rgba(54, 162, 235, 0.2)',
                'rgba(255, 206, 86, 0.2)',
                'rgba(75, 192, 192, 0.2)',
                'rgba(153, 102, 255, 0.2)',
                'rgba(255, 159, 64, 0.2)'
            ],
            borderColor: [
                'rgba(255, 99, 132, 1)',
                'rgba(54, 162, 235, 1)',
                'rgba(255, 206, 86, 1)',
                'rgba(75, 192, 192, 1)',
                'rgba(153, 102, 255, 1)',
                'rgba(255, 159, 64, 1)'
            ],
            borderWidth: 1
        }]
    },
    options: {
        scales: {
            y: {
                beginAtZero: true
            }
        }
    }
});
</script>
html 파일에 가져오기
\webFlask\templates\led_control.html
<html>
  <head>
    <link rel="stylesheet" type="text/css" href="/static/css/bootstrap.min.css"
    <title>
      Web LED Control
    </title>
  </head>
  <body>
    <center>
      <br>
      <strong>HOME IOT Service</strong>
      </br>

      <table style="width:50%">
      <tr>
        <td class="auto-style6" style="height: 81; width: 30%">
        <strong>
          <a class="btn btn-success" href="led_control_act?led=1"> LED 켜기 </a>
        </strong>
      </td>
      <td class="auto-style6" style="height: 81; width: 30%">
        <strong>
          <a class="btn btn-danger" href="led_control_act?led=2"> LED 끄기 </a>
        </strong>
      </td>
      </tr>
    </table>
    <br/>
    <div class="card" style="width: 18rem;">
      {% if ret == 'ON' %} <!-- html 조건문 -->
      <img src="static/on.PNG" class="card-img-top">
      {% elif ret == 'OFF' %} <!-- html 조건문 -->
      <img src="static/off.PNG" class="card-img-top">
      {% endif %} <!-- html 조건문 -->
      <div class="card-body">
        <hs class="card-title">title</hs>
        <p class="card-text"> LED is {{ret}}</p>
        <strong>LED is {{ret}}</strong>
      </div>
    </div>
    </center>
  </body>
</html>

<style type="text/css">
  .auto-style6{
    border-style: solid;
    border-color: #000000;
    text-align: center;
    color: #ffffff;
    background-color: #FF9900;
  }
</style>

<script src="https://cdn.jsdelivr.net/npm/chart.js@2.8.0"></script>
<canvas id="myChart" width="400" height="400"></canvas>
<script>
const ctx = document.getElementById('myChart').getContext('2d');
const myChart = new Chart(ctx, {
    type: 'bar',
    data: {
        labels: ['Red', 'Blue', 'Yellow', 'Green', 'Purple', 'Orange'],
        datasets: [{
            label: '# of Votes',
            data: [12, 19, 3, 5, 2, 3],
            backgroundColor: [
                'rgba(255, 99, 132, 0.2)',
                'rgba(54, 162, 235, 0.2)',
                'rgba(255, 206, 86, 0.2)',
                'rgba(75, 192, 192, 0.2)',
                'rgba(153, 102, 255, 0.2)',
                'rgba(255, 159, 64, 0.2)'
            ],
            borderColor: [
                'rgba(255, 99, 132, 1)',
                'rgba(54, 162, 235, 1)',
                'rgba(255, 206, 86, 1)',
                'rgba(75, 192, 192, 1)',
                'rgba(153, 102, 255, 1)',
                'rgba(255, 159, 64, 1)'
            ],
            borderWidth: 1
        }]
    },
    options: {
        scales: {
            y: {
                beginAtZero: true
            }
        }
    }
});
</script>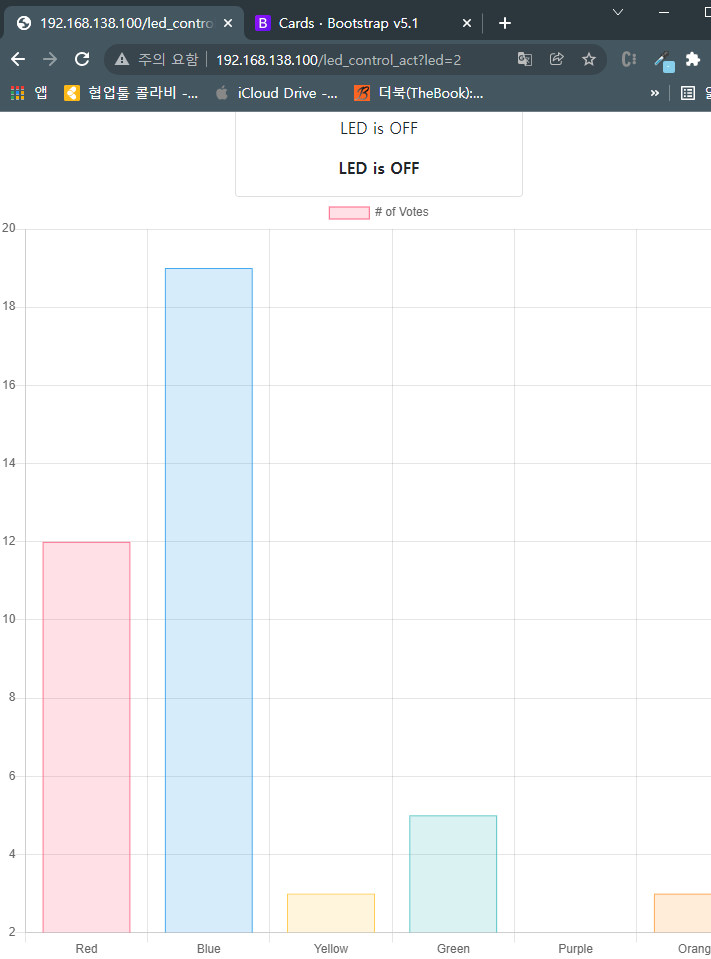
on, off로 수정
\webFlask\templates\led_control.html
<html>
  <head>
    <link rel="stylesheet" type="text/css" href="/static/css/bootstrap.min.css"
    <title>
      Web LED Control
    </title>
  </head>
  <body>
    <center>
      <br>
      <strong>HOME IOT Service</strong>
      </br>

      <table style="width:50%">
      <tr>
        <td class="auto-style6" style="height: 81; width: 30%">
        <strong>
          <a class="btn btn-success" href="led_control_act?led=1"> LED 켜기 </a>
        </strong>
      </td>
      <td class="auto-style6" style="height: 81; width: 30%">
        <strong>
          <a class="btn btn-danger" href="led_control_act?led=2"> LED 끄기 </a>
        </strong>
      </td>
      </tr>
    </table>
    <br/>
    <div class="card" style="width: 18rem;">
      {% if ret == 'ON' %} <!-- html 조건문 -->
      <img src="static/on.PNG" class="card-img-top">
      {% elif ret == 'OFF' %} <!-- html 조건문 -->
      <img src="static/off.PNG" class="card-img-top">
      {% endif %} <!-- html 조건문 -->
      <div class="card-body">
        <hs class="card-title">title</hs>
        <p class="card-text"> LED is {{ret}}</p>
        <strong>LED is {{ret}}</strong>
      </div>
    </div>
    </center>
  </body>
</html>

<style type="text/css">
  .auto-style6{
    border-style: solid;
    border-color: #000000;
    text-align: center;
    color: #ffffff;
    background-color: #FF9900;
  }
</style>

<script src="https://cdn.jsdelivr.net/npm/chart.js@2.8.0"></script>
<canvas id="myChart" width="400" height="400"></canvas>
<script>
const ctx = document.getElementById('myChart').getContext('2d');
const myChart = new Chart(ctx, {
    type: 'bar',
    data: {
        labels: ['On', 'Off'],
        datasets: [{
            label: '# of Votes',
            data: {{values}},
            backgroundColor: [
                'rgba(255, 99, 132, 0.2)',
                'rgba(54, 162, 235, 0.2)'
            ],
            borderColor: [
                'rgba(255, 99, 132, 1)',
                'rgba(54, 162, 235, 1)'
            ],
            borderWidth: 1
        }]
    },
    options: {
        scales: {
            y: {
                beginAtZero: true
            }
        }
    }
})
인덱스 파일 설정
\webFlask\templates\led_control.py
from flask import Flask, render_template, request
import RPi.GPIO as GPIO
from flask.templating import render_template_string

LED = 17
GPIO.setmode(GPIO.BCM)
GPIO.setup(LED, GPIO.OUT)

app = Flask(__name__)

@app.route('/led_control')
def led_control():
  data = []
  return render_template('led_control.html', values = data)

@app.route('/led_control_act', methods=['GET'])
def led_control_act():
  data = []
  if request.method == 'GET':
    status = ''
    led = request.args["led"]
    if led == '1':
      GPIO.output(LED, True)
      status = 'ON'
      data = [1, 0]
    else:
      GPIO.output(LED, False)
      status = 'OFF'
      data = [0,1]
  return render_template('led_control.html', ret = status, values = data)

if __name__=='__main__':
  app.run(debug=True, port=80, host='0.0.0.0')

복습
1번
라즈베리 파이 보드 GPIO 17번 핀으로 제어하는 LED 회로 구성
조건
N(n)키를 누르면 led가 켜지고
F(f)키를 누르면 led가 꺼지도록 만들기
요소 활용
While / Input() / If, elif / GPIO setup output 이용
import RPi.GPIO as GPIO

led_pin = 17

GPIO.setmode(GPIO.BCM)

GPIO.setup(led_pin, GPIO.OUT)
GPIO.output(led_pin, False) # 디폴트 상태

try:
  while True:
    userInput = input() # 키보드 인풋값 받아오기
    if userInput == 'n':
        GPIO.output(led_pin, True)
    elif userInput == 'f':
        GPIO.output(led_pin, False)

except KeyboardInterrupt:
  pass

GPIO.cleanup()
2번
라즈베리 파이 보드 GPIO 18번 핀으로 제어하는 LED 회로 구성
조건
숫자 0 누르면 LED 밝기 0
숫자 5 누르면 LED 밝기 50%
T 누르면 100%로 조절하기
요소 활용
PWM 활용 : pwm.ChangeDutyCycle()
import RPi.GPIO as GPIO

led_pin = 18
GPIO.setmode(GPIO.BCM)
GPIO.setup(led_pin, GPIO.OUT)

pwm = GPIO.PWM(led_pin, 100.0)
pwm.start(0)

try:
  while True:
    userInput = input()
    if userInput == '0':
        pwm.ChangeDutyCycle(0) # 0%
    if userInput == '5':
        pwm.ChangeDutyCycle(50) # 50%
    if userInput == 'T':
        pwm.ChangeDutyCycle(100) # 100%

except KeyboardInterrupt:
  pass

pwm.stop()
GPIO.cleanup()
3번
GPIO 18번으로 제어하는 부저 회로 구성
조건
A 를 누르면 도를 0.5초 동안
S 를 누르면 레를 0.5초 동안
D 를 누르면 미를 0.5초 동안
F 를 누르면 파를 0.5초 동안
G 를 누르면 솔를 0.5초 동안
H 를 누르면 라를 0.5초 동안
J 를 누르면 시를 0.5초 동안
K 를 누르면 도를 0.5초 동안
melody = [262,294,330,349,392,440,494,523]
요소 활용
배열, 반복문, PWM 활용
내가 짠 코드
import RPi.GPIO as GPIO
import time

buzzer_pin = 18

GPIO.setmode(GPIO.BCM)

GPIO.setup(buzzer_pin, GPIO.OUT)

pwm = GPIO.PWM(buzzer_pin, 1.0)

melody = [262,294,330,349,392,440,494,523]
# 음에 해당하는 주파수

def buzz_Freq(Piano):
  pwm.ChangeFrequency(melody[Piano]) # 피아노에 들어가는 배열 인덱스
  time.sleep(0.5)
  pwm.stop() # 멈춰줌

try:
  while True:
    userInput = input()
    pwm.start(90.0)
    if userInput == 'a':
      buzz_Freq(0)
    elif userInput == 's':
      buzz_Freq(1)
    elif userInput == 'd':
      buzz_Freq(2)
    elif userInput == 'f':
      buzz_Freq(3)
    elif userInput == 'g':
      buzz_Freq(4)
    elif userInput == 'h':
      buzz_Freq(5)
    elif userInput == 'j':
      buzz_Freq(6)
    elif userInput == 'k':
      buzz_Freq(7)

except KeyboardInterrupt:
  pass

GPIO.cleanup()강사님 코드
import RPi.GPIO as GPIO
import time

buzzer_pin =18

GPIO.setmode(GPIO.BCM)
GPIO.setup(buzzer_pin, GPIO.OUT)

pwm = GPIO.PWM(buzzer_pin, 1.0)
pwm.start(0.0)
melody = [262,294,330,349,392,440,494,523]    #melody 배열
keys = ["a", "s", "d", "f", "g", "h", "j", "k"] #key

try:
	while True:
		userInput = input() # for string
		print(userInput)
		for note in range(0,len(keys)):
			if userInput == keys[note]:
				pwm.ChangeFrequency(melody[note])
				pwm.ChangeDutyCycle(50.0)
				time.sleep(0.5)
				pwm.ChangeDutyCycle(0.0)
				break
except KeyboardInterrupt:
	pass

pwm.stop()
GPIO.cleanup()
(4번은 동일하여 스킵)
5번
라즈베리 파이 보드 GPIO 27번 핀으로 버튼 입력 받고 GPIO 22번 핀으로 제어하는 LED 회로 구성
조건
1. 한번 누르면 LED 켜져있음
2. 한번 더 누르면 LED 꺼져있음
(Toggle 처리)
요소 활용
버튼 입력은 외부 인터럽트 처리 or 반복문 상관 없음
import RPi.GPIO as GPIO

button_pin = 27
led_pin = 22

GPIO.setmode(GPIO.BCM)

GPIO.setup(button_pin, GPIO.IN)
GPIO.setup(led_pin, GPIO.OUT)

buttonInputPrev = False
ledOn = False

try:
  while True:
    buttonInput = GPIO.input(button_pin)

    if buttonInput and not buttonInputPrev:
      ledOn = True if not ledOn else False
      GPIO.output(led_pin, ledOn)
    else:
      pass
    buttonInputPrev = buttonInput

except KeyboardInterrupt:
  pass

GPIO.cleanup()
6번
라즈베리 파이 보드 GPIO 27번 핀으로 버튼 입력 받고 GPIO 22번 핀으로 제어하는 LED 회로 구성
조건
1. 누르기 전에 LED 밝기 0%
2. 한번 더 누르면 LED 밝기 50%
3. 한번 더 누르면 LED 밝기 100%
4. 한번 더 누르면 LED 밝기 0% ... 1, 2, 3 반복
요소 활용
조건문으로 상태 변경 처리
내가 짠 코드(실패)
import RPi.GPIO as GPIO

button_pin = 27
led_pin = 22

GPIO.setmode(GPIO.BCM)

GPIO.setup(button_pin, GPIO.IN)
GPIO.setup(led_pin, GPIO.OUT)

buttonInputPrev = False
ledOn = False

pwm = GPIO.PWM(led_pin, 100.0)

try:
  while True:
    buttonInput = GPIO.input(button_pin)
    pwm.start(0)
    if buttonInput and not buttonInputPrev:
      ledOn = True if not pwm.ChangeDutyCycle(50) else pwm.ChangeDutyCycle(100)

      GPIO.output(led_pin, ledOn)
    else:
      pass
    buttonInputPrev = buttonInput

except KeyboardInterrupt:
  pass

GPIO.cleanup()강사님 코드
import time
import RPi.GPIO as GPIO

button_pin =27
led_pin =22

GPIO.setmode(GPIO.BCM)

GPIO.setup(button_pin, GPIO.IN)
GPIO.setup(led_pin, GPIO.OUT)

pwm = GPIO.PWM(led_pin, 1000.0)
pwm.start(0.0) # 0.0~100.0

buttonInputPrev = False
cnt = 0

try:
	while True:
		buttonInput = GPIO.input(button_pin);

		# print(buttonInput)

		if buttonInput and not buttonInputPrev:

			cnt = cnt + 1
			if cnt == 3:
				cnt = 0

			print(cnt)
			time.sleep(0.3)
			if cnt == 0:
				pwm.ChangeDutyCycle(0)
			elif cnt == 1:
				pwm.ChangeDutyCycle(50)
			elif cnt == 2:
				pwm.ChangeDutyCycle(100)

		buttonInputPrev = buttonInput

except KeyboardInterrupt:
	pass

pwm.stop()
GPIO.cleanup(): 왜 카운트를 줄 생각을 못했을까!
7번
라즈베리 파이 보드 GPIO 27번 핀으로 버튼 입력 받고 GPIO 22번 핀으로 제어하는 부저 회로 구성
조건
누를 때마다 도,레,미,파,솔,라,시,도 소리 변경되도록 작성
요소 활용
조건문으로 상태 변경 처리
import RPi.GPIO as GPIO
import time

button_pin = 27
buzzer_pin = 22

GPIO.setmode(GPIO.BCM)

GPIO.setup(button_pin, GPIO.IN)
GPIO.setup(buzzer_pin, GPIO.OUT)

pwm = GPIO.PWM(buzzer_pin, 1.0)

melody = [262,294,330,349,392,440,494,523]
# 음에 해당하는 주파수

buttonInputPrev = False
cnt = 0

def buzz_Freq(Piano):
  pwm.ChangeFrequency(melody[Piano]) # 피아노에 들어가는 배열 인덱스
  time.sleep(0.5)
  pwm.stop() # 멈춰줌

try:
  while True:
    buttonInput = GPIO.input(button_pin)
    if buttonInput and not buttonInputPrev:

      cnt += 1
      if cnt == 8:
        cnt = 0

      print(cnt)

      pwm.start(90.0)
      if cnt == 0:
        buzz_Freq(0)
      if cnt == 1:
        buzz_Freq(1)
      if cnt == 2:
        buzz_Freq(2)
      if cnt == 3:
        buzz_Freq(3)
      if cnt == 4:
        buzz_Freq(4)
      if cnt == 5:
        buzz_Freq(5)
      if cnt == 6:
        buzz_Freq(6)
      if cnt == 7:
        buzz_Freq(7)

    buttonInputPrev = buttonInput


except KeyboardInterrupt:
  pass

GPIO.cleanup()
8번
라즈베리파이 보드의 GPIO 17번 핀 LED 연결
라즈베리파이 보드의 GPIO 18번 핀 LED 연결
조건
사용자가 확인할 수 있도록 처음에 print로 menu를 만들고 아래 로직 작성
1. n 입력은 첫번째 LED 켜기
2. f 입력은 첫번째 LED 끄기
3. 0 입력은 두번째 LED 밝기 0%
4. 5 입력은 두번째 LED 밝기 50%
5. t 입력은 두번째 LED 밝기 100%
내가 짠 코드
import RPi.GPIO as GPIO

ledPin1 = 17
GPIO.setmode(GPIO.BCM)
GPIO.setup(ledPin1, GPIO.OUT)
ledPin2 = 18
GPIO.setmode(GPIO.BCM)
GPIO.setup(ledPin2, GPIO.OUT)

pwm = GPIO.PWM(ledPin2, 100)

def menu():
  print('----------- menu -----------')
  print('n 입력 - 첫번째 LED 켜기')
  print('f 입력 - 첫번째 LED 끄기')
  print('0 입력 - 두번째 LED 밝기 0%')
  print('5 입력 - 두번째 LED 밝기 50%')
  print('t 입력 - 두번째 LED 밝기 100%')

try:
  while True:
    menu()
    userInput = input()
    if userInput == 'n': # 첫번째 LED 제어
      GPIO.output(ledPin1, True) # 첫번째 LED 켜기
    elif userInput == 'f':
      GPIO.output(ledPin1, False) # 첫번째 LED 끄기

    pwm.start(0)
    if userInput == '0': # 두번째 LED 제어
      pwm.ChangeDutyCycle(0)
    if userInput == '5':
      pwm.ChangeDutyCycle(50)
    if userInput == 't':
      pwm.ChangeDutyCycle(100)

except KeyboardInterrupt:
  pass

GPIO.cleanup()강사님 코드
import RPi.GPIO as GPIO
import time

led_red_pin =17
led_blue_pin =18

GPIO.setmode(GPIO.BCM)

GPIO.setup(led_red_pin, GPIO.OUT)
GPIO.setup(led_blue_pin, GPIO.OUT)


GPIO.output(led_red_pin, False)

pwm_blue_led = GPIO.PWM(led_blue_pin, 1000.0)
pwm_blue_led.start(0.0) # 0.0~100.0

def showMenu():
	print("==<<MENU>>==");
	print("n. 빨간색 LED 켜기");
	print("f. 빨간색 LED 끄기");
	print("0. 파란색 LED 밝기 0%");
	print("5. 파란색 LED 밝기 50%");
	print("t. 파란색 LED 밝기 100%");


showMenu()
while True:
	userInput = input(">>>");
	# 여기를 채워 예제를 완성합니다.
	print(userInput)
	if userInput == "n":
		GPIO.output(led_red_pin, True)
	elif userInput == "f":
		GPIO.output(led_red_pin, False)
	if userInput == "0":
		pwm_blue_led.ChangeDutyCycle(0)
	elif userInput == "5":
		pwm_blue_led.ChangeDutyCycle(50)
	elif userInput == "t":
		pwm_blue_led.ChangeDutyCycle(100)
9번
라즈베리파이 GPIO17 LED연결
라즈베리파이 GPIO27 LED연결
라즈베리파이 GPIO23 LED연결
조건
1. 첫번째 LED는 0.5초 주기로 깜박
2. 두번째 LED는 1.5초 주기로 깜박
3. 세번째 LED는 2.5초 주기로 깜박
쓰레드 두개 이상 생성해서 로직 만들기
강사님 코드
import RPi.GPIO as GPIO
import threading
import time

led_red_pin =17
led_green_pin =27
led_blue_pin =23

GPIO.setmode(GPIO.BCM)

GPIO.setup(led_red_pin, GPIO.OUT)
GPIO.setup(led_green_pin, GPIO.OUT)
GPIO.setup(led_blue_pin, GPIO.OUT)

GPIO.output(led_red_pin, False)
GPIO.output(led_green_pin, False)
GPIO.output(led_blue_pin, False)

flag_exit = False
def t1_main():
	while True:
		GPIO.output(led_green_pin, True)
		time.sleep(0.5)
		GPIO.output(led_green_pin, False)
		time.sleep(0.5)
		if flag_exit: break

def t2_main():
	while True:
		GPIO.output(led_blue_pin, True)
		time.sleep(1.5)
		GPIO.output(led_blue_pin, False)
		time.sleep(1.5)
		if flag_exit: break

t1 = threading.Thread(target=t1_main)
t1.start()
t2 = threading.Thread(target=t2_main)
t2.start()

try:
	while True:
		GPIO.output(led_red_pin, True)
		time.sleep(2.5)
		GPIO.output(led_red_pin, False)
		time.sleep(2.5)

except KeyboardInterrupt:
	pass

flag_exit = True
t1.join()
t2.join()
GPIO.cleanup()느낀 점
근데 파이썬은 4칸 띄워야하는 거 아닌가? esLint 덕분에 2칸 띄워도 잘 작동하는건가? 궁금하다.
'공부 > Digital Twin Bootcamp' 카테고리의 다른 글
| TIL_220112_IOT (0) | 2022.01.12 |
|---|---|
| TIL_220111_IOT (0) | 2022.01.11 |
| TIL_220107_IOT (1) | 2022.01.07 |
| TIL_220106_Backend (1) | 2022.01.06 |
| TIL_210105_Backend (0) | 2022.01.05 |